Introduction to Raising Cane’s Chicken Fingers
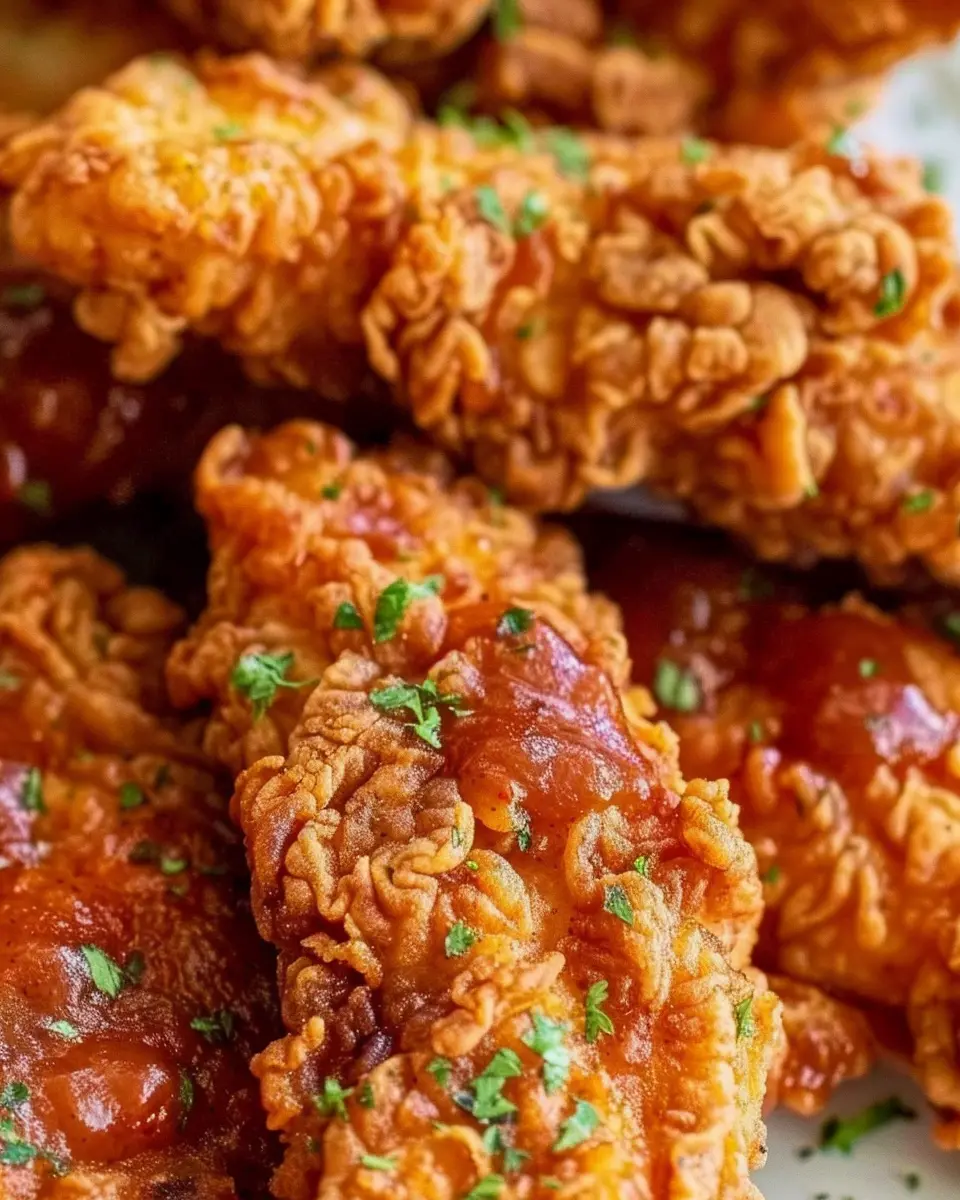
When you think of comfort food, Raising Cane’s Chicken Fingers might pop into your mind. After all, who can resist that crispy, tender chicken, paired perfectly with a delicious dipping sauce? The appeal of a classic fast-food experience may have you wondering—why not try recreating this beloved dish at home?
Why homemade versions matter
Homemade meals have a charm and warmth that store-bought or takeout just can’t match. When you whip up a batch of Raising Cane’s Chicken Fingers, you’re not just making dinner—you’re creating memories. Studies show that cooking at home can enhance family bonding and even improve your overall well-being. Plus, by preparing these chicken fingers yourself, you have full control over the ingredients. This means you can opt for healthier choices or even tailor flavors to fit your preferences. With just a few ingredients, you can replicate the crispy texture and flavor of those famous chicken fingers, setting the stage for a fantastic meal.
Bringing the restaurant experience home
Imagine a Saturday evening where you skip the drive-thru and bring the joy of Raising Cane’s Chicken Fingers right to your dining table. Shuffling some friends over or sharing it with family can turn an ordinary night into a fun culinary adventure. Not only can you serve up delicious chicken, but you can also craft your signature dipping sauce, taking inspiration from the original while adding your personal flair.
A well-crafted meal brings everyone together. Just think about how much fun it can be to have a “chicken finger bar” at home, paired with various dipping sauces, sides, and drinks. Who wouldn’t want to experiment with spicy options or a tangy twist?
So get ready, as we dive into an incredible recipe for Raising Cane’s Chicken Fingers and Sauce. Prepare yourself to savor the crunchy goodness straight from your kitchen without having to step foot outside. With the right guidance and a splash of creativity, your homemade experience might just become your new favorite way to enjoy this classic dish.
For more insights on transforming your kitchen into a culinary haven, check out articles from the Culinary Institute of America for expert tips!

Ingredients for Raising Cane’s Chicken Fingers
Essential Ingredients for Crispy Chicken
To replicate the delightful crunch of Raising Cane’s Chicken Fingers at home, you’ll need a few key ingredients:
- Chicken Tenderloins: Fresh tenderloins ensure juiciness and flavor.
- All-Purpose Flour: This forms the base of your breading, giving that signature crispness.
- Cornstarch: A secret ingredient for a light, airy texture.
- Eggs: Beaten eggs help the coating adhere beautifully.
- Salt and Pepper: Simple spices that enhance the flavor without overpowering the chicken.
- Seasoning Blend: Think garlic powder, onion powder, and paprika for a mouthwatering kick.
Key Ingredients for the Famous Dipping Sauce
Now, let’s dive into the creamy goodness that pairs so perfectly with these chicken fingers. Here’s what you need for the dipping sauce:
- Mayonnaise: The creamy base of the sauce.
- Ketchup: Adds a subtle sweetness.
- Garlic Powder and Pepper: These elevate the flavor profile, making the sauce irresistible.
- Lemon Juice: A splash for that little zing!
Creating the ultimate Raising Cane’s Chicken Fingers experience at home starts with these essential ingredients. Check out more tips on preparing crispy chicken from Serious Eats to enhance your culinary game!
Preparing Raising Cane’s Chicken Fingers
If you’re eager to recreate the deliciousness of Raising Cane’s Chicken Fingers at home, you’re in for a treat! With a few carefully planned steps, you can achieve that same crispiness and flavor that keeps everyone coming back for more. Here’s a comprehensive guide to make mouthwatering chicken fingers from scratch.
Marinate the Chicken for Tenderness
Let’s start with the most crucial step to ensure your chicken is tender and succulent. Marinating the chicken not only adds flavor but also helps break down the proteins to keep the meat juicy.
- Choose the right chicken: Opt for chicken tenders or sliced chicken breasts. They’re naturally tender and cook quickly.
- Marinate: Mix together buttermilk, garlic powder, onion powder, and a bit of paprika in a bowl. Immerse the chicken in this mixture and let it marinate for at least 2 hours, or even overnight in the fridge for optimal tenderness. This is perfect for busy professionals juggling their cooking time!
- Why buttermilk?: The acidity in buttermilk serves to tenderize the meat, making it super juicy – a technique championed by famous chefs like Thomas Keller.
Prepare the Seasoned Flour Mixture
Flavor your coating with a delicious blend of spices. This step is crucial in ensuring your Raising Cane’s Chicken Fingers turn out flavorful.
- Base flour: Start with all-purpose flour as your main ingredient to create that signature crispiness.
- Seasoning: Add a pinch of salt, black pepper, and your favorite spices. Think along the lines of garlic powder, cayenne pepper for some heat, and even a sprinkle of dried herbs if you like. Experiment with your own combinations!
- Whisk it all together: This ensures the spices are evenly distributed throughout your flour.
Coat the Chicken for Extra Crispiness
Once your chicken has marinated and your seasoned flour is ready, it’s time to coat!
- Remove the chicken from the marinade: Let any excess liquid drip off.
- Dredge in seasoned flour: Coat each piece of chicken thoroughly. For an extra crispy texture, consider double-dipping: flour, then back to the marinade, and finally back into the seasoned flour.
- Shake off the excess: This helps achieve a light, crispy crust rather than a heavy batter.
Heat the Oil to the Perfect Temperature
Frying is an art of precision—getting the oil to the right temperature makes all the difference.
- Use a cast-iron skillet or deep fryer: These options retain heat well, ensuring even cooking.
- Test the oil: Heat the oil to around 350°F (175°C). Drop a small piece of bread in; if it bubbles and browns in about 60 seconds, you’re good to go.
Fry to Golden Perfection
This is where the magic happens!
- Carefully add the chicken: Don’t overcrowd the pan, as it can lower the temperature of the oil. Fry in batches if necessary.
- Cook until golden brown: Each side should take about 4-6 minutes. You know it’s done when the internal temperature reaches 165°F (75°C).
Make the Dipping Sauce While the Chicken Fries
While your chicken is sizzling away, it’s the perfect time to whip up a homemade dipping sauce that complements the flavors beautifully.
- Ingredients: Mix together mayonnaise, ketchup, a dash of Worcestershire sauce, and a sprinkle of garlic powder.
- Adjust flavors: You can customize the sauce by adding hot sauce for a spicy kick or a drizzle of honey for sweetness.
It’s all about timing and multitasking—it might just become your secret weapon in the kitchen!
With these steps, you’re well on your way to enjoying a homemade version of Raising Cane’s Chicken Fingers. Trust me, your friends and family will applaud your efforts. Don’t forget to share your experience in the comments below, and consider exploring more about the science of frying on reputable sites like Serious Eats for pro tips!
Variations on Raising Cane’s Chicken Fingers
When it comes to Raising Cane’s Chicken Fingers, the possibilities extend far beyond the classic dish. Let’s dive into some delicious variations that will allow you to tailor the experience to your taste buds!
Spicy Chicken Fingers for Heat Lovers
For those who crave a little extra heat, consider turning your chicken fingers into spicy sensations. Here’s how to elevate your recipe:
- Spicy Marinade: Before breading, soak your chicken strips in a mixture of buttermilk, hot sauce, and a dash of cayenne pepper. This will infuse flavor and give your fingers a fiery kick.
- Spiced Coating: Mix in some chili powder or crushed red pepper flakes into your breadcrumb coating for added heat.
- Dipping options: Pair your spicy chicken fingers with a creamy ranch or a tangy, spicy jalapeño sauce to complement the heat, balancing flavor and fire.
Vegetarian Options Using Plant-Based Alternatives
If you’re looking for a meat-free option, you can whip up a vegetarian twist on Raising Cane’s Chicken Fingers. Here are a couple of ideas:
- Chickpea Patties: Mash canned chickpeas and form them into strips. Follow similar breading procedures for traditional chicken fingers, and fry or bake until golden brown.
- Tofu Points: Extra-firm tofu can easily substitute chicken. Press it to remove moisture, cut it into strips, marinate in soy sauce and spices, then coat and fry just like you would with chicken.
These alternatives are not just for vegetarians—they’re a fun way to add variety to a standard meal! For more plant-based inspirations, check out resources like Forks Over Knives.
These variations help you cater to different tastes while keeping that beloved essence of Raising Cane’s Chicken Fingers. Enjoy experimenting and delight your guests with unique flavors!
Cooking Tips and Notes for Raising Cane’s Chicken Fingers
Ensuring the Perfect Fry
To achieve those perfectly crisp Raising Cane’s Chicken Fingers, start by using a thermometer to ensure your oil is between 350°F and 375°F before frying. This temperature range allows for a golden-brown exterior while keeping the chicken juicy inside. Avoid overcrowding the pan; fry in batches to maintain oil temperature. Letting the chicken rest on a cooling rack after frying will help keep that crisp texture—no one likes soggy fingers!
Storing and Reheating Leftovers
If you somehow have leftovers (though that’s a big if!), make sure to store them in an airtight container in the fridge. They should stay fresh for up to three days. For reheating, skip the microwave; instead, pop them back in a hot oven (around 375°F) for 10-15 minutes. This keeps the breading crispy while warming the chicken properly. For more tips on proper food storage, check out the USDA’s recommendations.
With these simple tips, you’ll be enjoying Raising Cane’s Chicken Fingers as if they were just made!

Serving suggestions for Raising Cane’s Chicken Fingers
Pairing with sides for a complete meal
When you’re ready to indulge in delicious Raising Cane’s Chicken Fingers, think about rounding out your meal with some tasty sides. Classic options include crinkle-cut fries that are crispy and perfect for dipping. Consider adding a colorful garden salad for a refreshing contrast, or go for coleslaw if you’re craving something creamy. For a twist, try pairing your chicken fingers with sweet potato fries—the sweet and savory combination is delightful.
Creative ideas for dipping sauces
While the famous Cane’s sauce is a must-have, don’t stop there! Get creative with your dipping options:
- Honey Mustard: A sweet and tangy kick.
- BBQ Sauce: Smoky and rich, it complements the chicken fingers beautifully.
- Buffalo Sauce: Spice things up for those who love heat.
- Ranch Dressing: A classic favorite for a cool and creamy dip.
These alternatives show that there are endless possibilities to elevate your Raising Cane’s Chicken Fingers experience. Why not host a dipping sauce tasting party for your friends? The options are only limited by your imagination!
For more ideas, check out this article on popular dipping sauces to really get your creativity flowing.
Time Breakdown for Raising Cane’s Chicken Fingers
When you’re craving Raising Cane’s Chicken Fingers, knowing how long it takes to whip up this delicious recipe is key for your meal planning. Here’s a detailed breakdown of the time commitment involved in creating this mouthwatering dish.
Preparation Time
Getting those ingredients ready is the first step. You can expect to spend about 20 minutes on preparation. This includes marinating the chicken, mixing your seasonings, and setting up your cooking station. The more organized you are, the smoother this stage will go!
Cooking Time
Now, it’s showtime! Cooking the chicken fingers will take approximately 15-20 minutes, depending on how crispy you like them. Remember, getting that perfect golden-brown color is vital for both taste and presentation. Trust me, it’s worth the wait.
Total Time
All in all, you’re looking at about 35-40 minutes to go from kitchen novice to Raising Cane’s Chicken Fingers aficionado. Perfect for a weeknight dinner or weekend gathering with friends! If you’re interested in tips for optimal cooking techniques, check out great resources like Serious Eats or The Kitchn for professional advice to elevate your cooking game.
Nutritional Facts for Raising Cane’s Chicken Fingers
Calories per Serving
A serving of Raising Cane’s Chicken Fingers packs around 440 calories. While this might seem hefty, it’s essential to remember that these calories come from a balanced mix of protein and fat, making it a satisfying meal choice.
Protein Content
What really stands out about Raising Cane’s Chicken Fingers is their protein content. Each serving can deliver approximately 23 grams of protein, crucial for muscle repair and overall health. If you’re looking to boost your protein intake, this dish is a delicious option.
Key Nutrients to Consider
When enjoying Raising Cane’s Chicken Fingers, you also benefit from essential nutrients:
- Iron: Vital for energy levels and transporting oxygen in the blood.
- Calcium: Important for bone health, especially if you’re active.
- Sodium: While some may need to watch their intake, the sodium helps enhance flavor.
For a deeper dive into these metrics, consider checking resources like USDA FoodData Central or NutritionData. Balancing this dish with a side of veggies or a fresh salad can elevate its nutritional profile, making it not just a tasty treat but also a part of a wholesome diet.
Always remember, moderation is key, and pairing your Raising Cane’s Chicken Fingers with mindful sides can create a well-rounded meal!
FAQs about Raising Cane’s Chicken Fingers
Can I bake the chicken instead of frying?
Absolutely! While frying gives you that classic, crispy texture found in Raising Cane’s Chicken Fingers, baking is a healthier alternative. To bake, preheat your oven to 425°F (218°C). Prepare your breaded chicken fingers as usual, then place them on a baking sheet lined with parchment paper. Bake for about 15-20 minutes, flipping them halfway through, until they reach a golden-brown color and are cooked through. You may not get the exact crunchiness of frying, but it can still be delicious!
What can I use if I don’t have buttermilk?
No buttermilk? No problem! You can substitute it easily with regular milk. Just add a tablespoon of white vinegar or lemon juice to 1 cup of milk and let it sit for about 5-10 minutes. This will mimic the acidity of buttermilk. Alternatively, yogurt can also work, mixed with a bit of water to thin it out. This will maintain the moisture and flavor needed to make your chicken tender and juicy.
How can I make the dipping sauce more tangy?
If you want to amp up the tang in your dipping sauce reminiscent of Raising Cane’s Chicken Fingers signature dip, consider these adjustments:
- Add more vinegar: A teaspoon or two of apple cider vinegar can give you that zesty kick.
- Incorporate mustard: A small dollop of yellow mustard will bring a whole new dimension to your sauce without overpowering it.
- Mix in some hot sauce: If you’re a fan of heat, a few drops of your favorite hot sauce will do the trick.
By experimenting with these simple tweaks, you can create your perfect, tangy blend that’s sure to impress!
Feel free to check out more tips from The Kitchn or Serious Eats for additional insights on chicken preparations!
Conclusion on Raising Cane’s Chicken Fingers
Embracing Homemade Cooking for Healthier Choices
Making Raising Cane’s Chicken Fingers at home empowers you to whip up a delicious meal while controlling the ingredients. You can use lean cuts of chicken and choose healthier frying options, making this dish not just a treat but a wholesome choice. Plus, it’s a fun way to spend an evening. Cooking together can create lasting memories, and you can even set a challenge to see who can make the crispiest chicken!
Encouragement to Experiment with Your Own Recipes
Don’t hesitate to put your spin on the classic recipe! Try adding spices or herbs that resonate with your palate. Maybe you want to concoct a unique dipping sauce or substitute chicken for Turkey Bacon or Chicken Ham. The joy of home cooking lies in experimentation, so start exploring and find what tantalizes your taste buds! For more inspiration, check out resources like Serious Eats or Bon Appétit. Your culinary journey awaits!
PrintRaising Cane’s Chicken Fingers: The Best Homemade Recipe You’ll Love

Discover how to make the iconic Raising Cane’s Chicken Fingers and Sauce at home with this incredible recipe.
- Prep Time: 20 minutes
- Cook Time: 15 minutes
- Total Time: 35 minutes
- Yield: 4 servings 1x
- Category: Dinner
- Method: Fried
- Cuisine: American
- Diet: Gluten-Free
Ingredients
- 2 cups all-purpose flour
- 1 teaspoon garlic powder
- 1 teaspoon paprika
- 1/2 teaspoon salt
- 1/4 teaspoon black pepper
- 1 egg
- 1 cup buttermilk
- 2 pounds chicken tenders
- Vegetable oil for frying
Instructions
- In a large bowl, combine flour, garlic powder, paprika, salt, and black pepper.
- In another bowl, beat the egg and whisk in the buttermilk.
- Dip the chicken tenders into the buttermilk mixture, then dredge in the flour mixture, coating evenly.
- Heat vegetable oil in a deep skillet over medium-high heat.
- Fry the chicken tenders in batches until golden brown and cooked through, about 5-7 minutes per side.
- Drain on paper towels and serve hot.
Notes
- For extra flavor, marinate the chicken in spices for a few hours before frying.
- Serve with your favorite dipping sauce for the full experience.
Nutrition
- Serving Size: 1 serving
- Calories: 350
- Sugar: 1g
- Sodium: 700mg
- Fat: 20g
- Saturated Fat: 3g
- Unsaturated Fat: 15g
- Trans Fat: 0g
- Carbohydrates: 30g
- Fiber: 1g
- Protein: 20g
- Cholesterol: 70mg
Keywords: Raising Cane’s Chicken Fingers, homemade chicken fingers, chicken tenders recipe