Introduction to Geode Cookies
What are geode cookies and why are they trending?
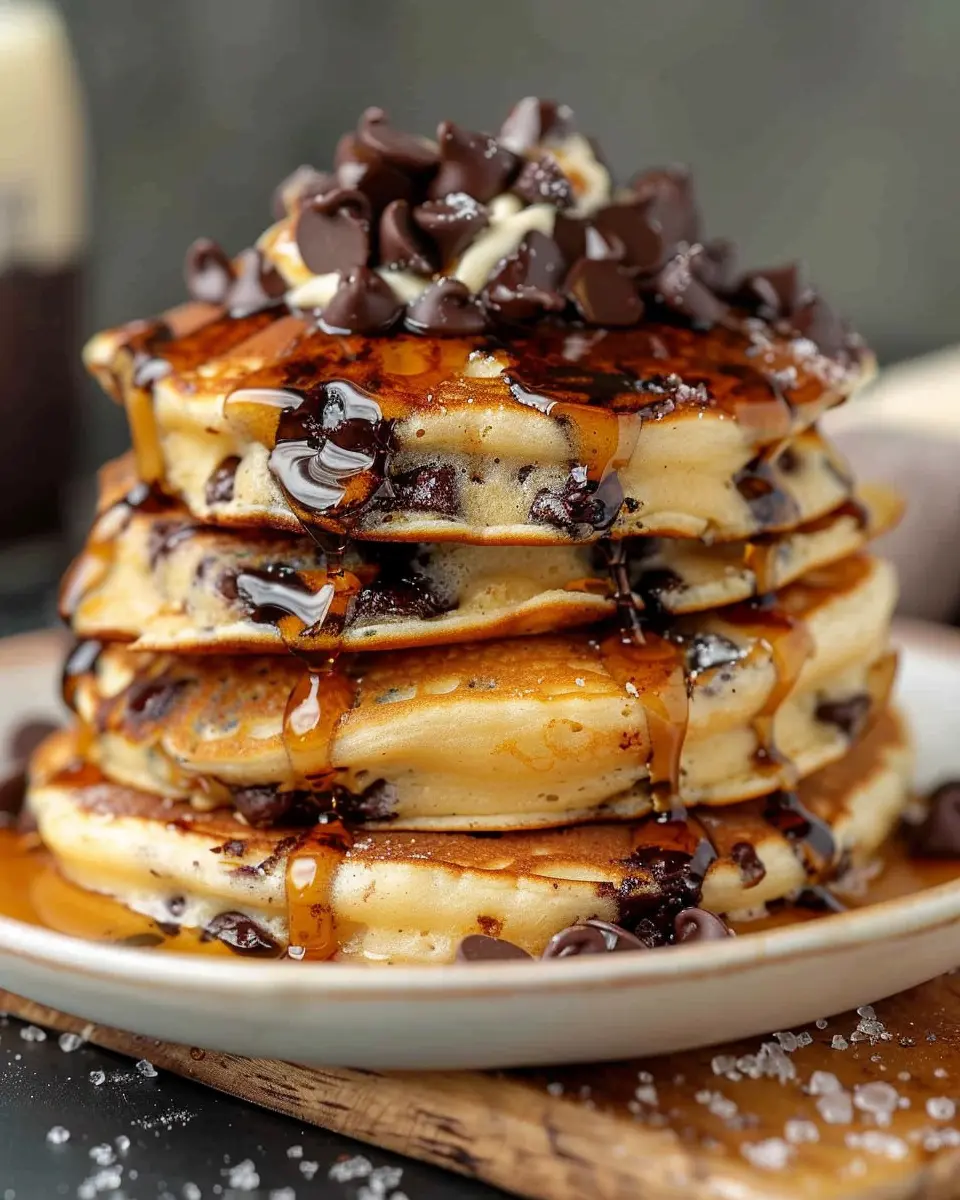
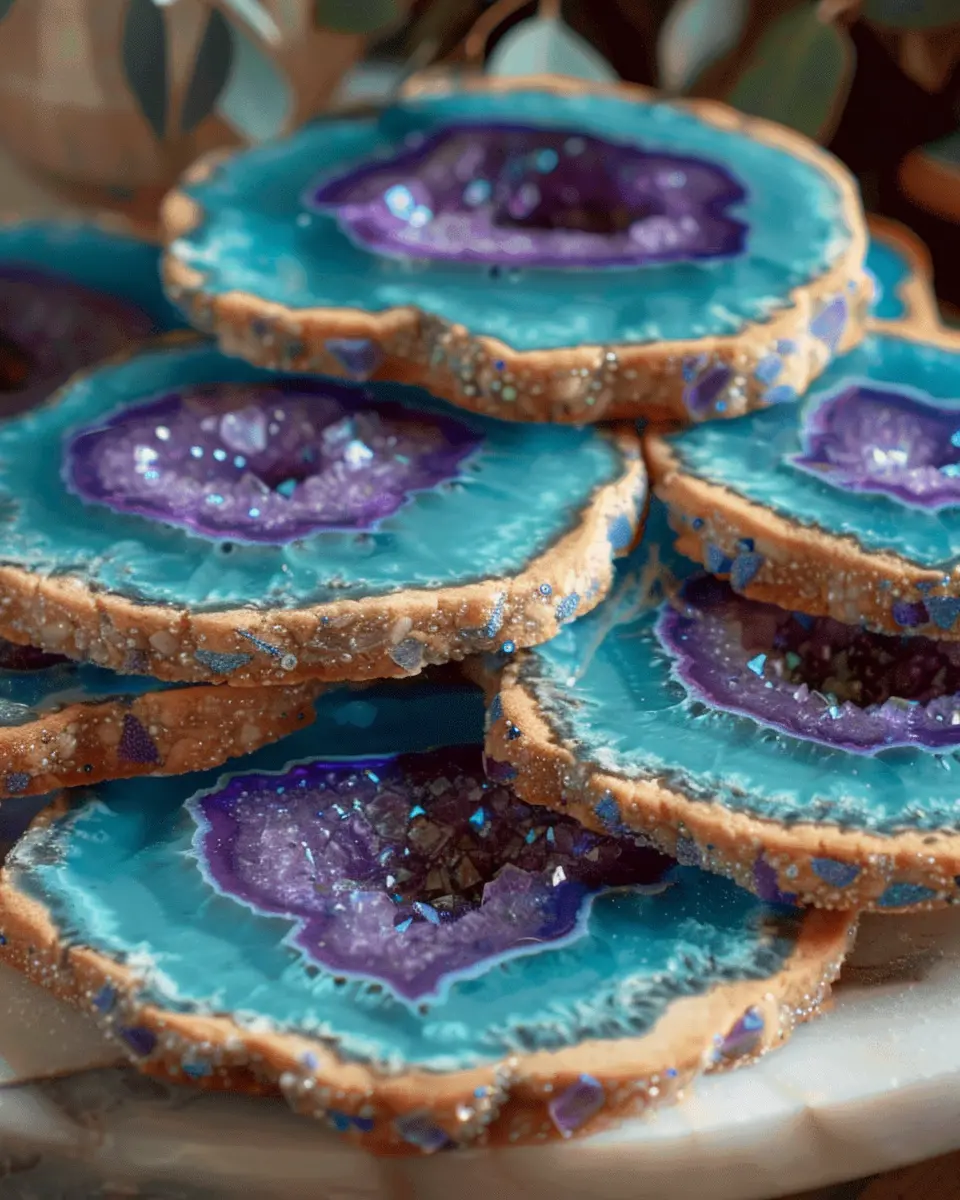
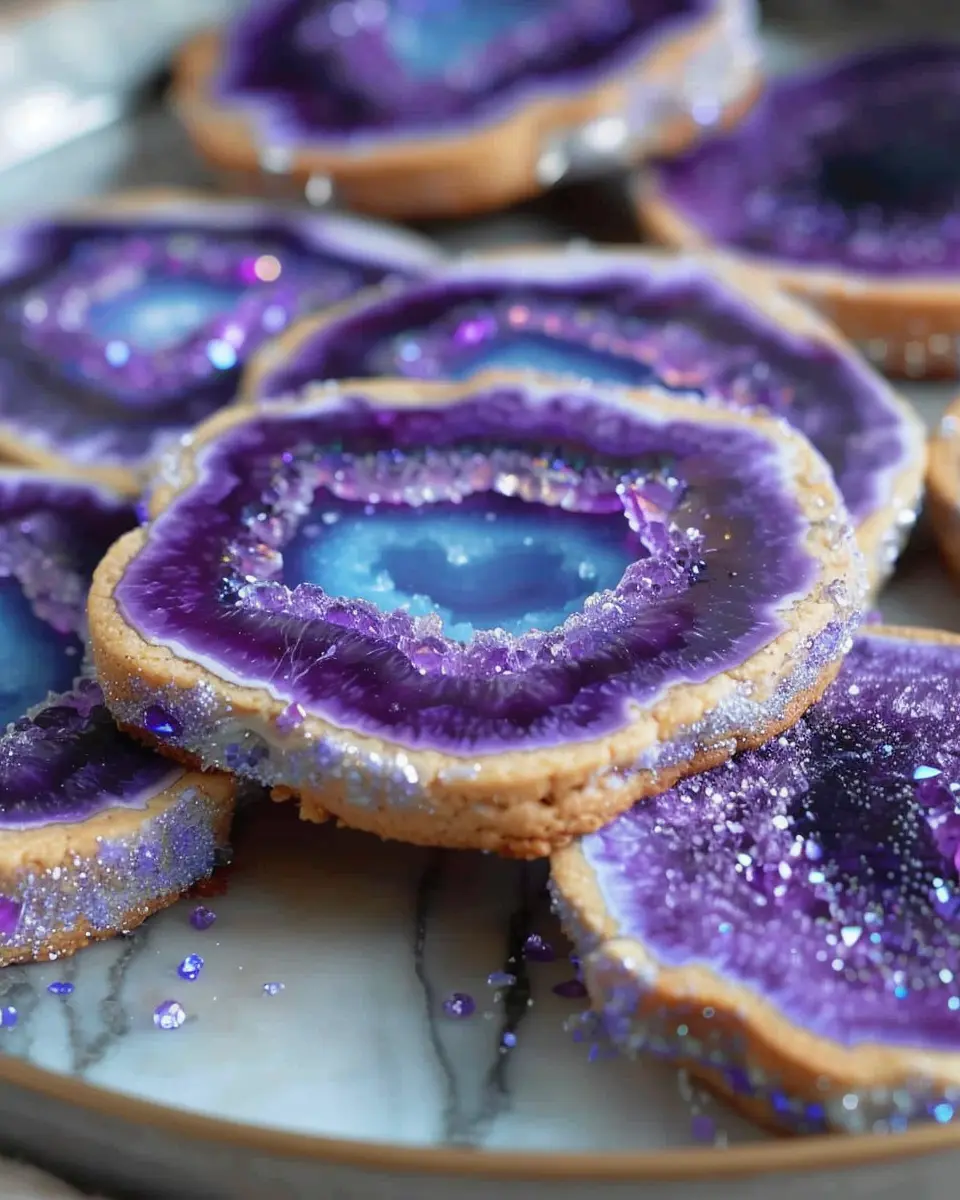
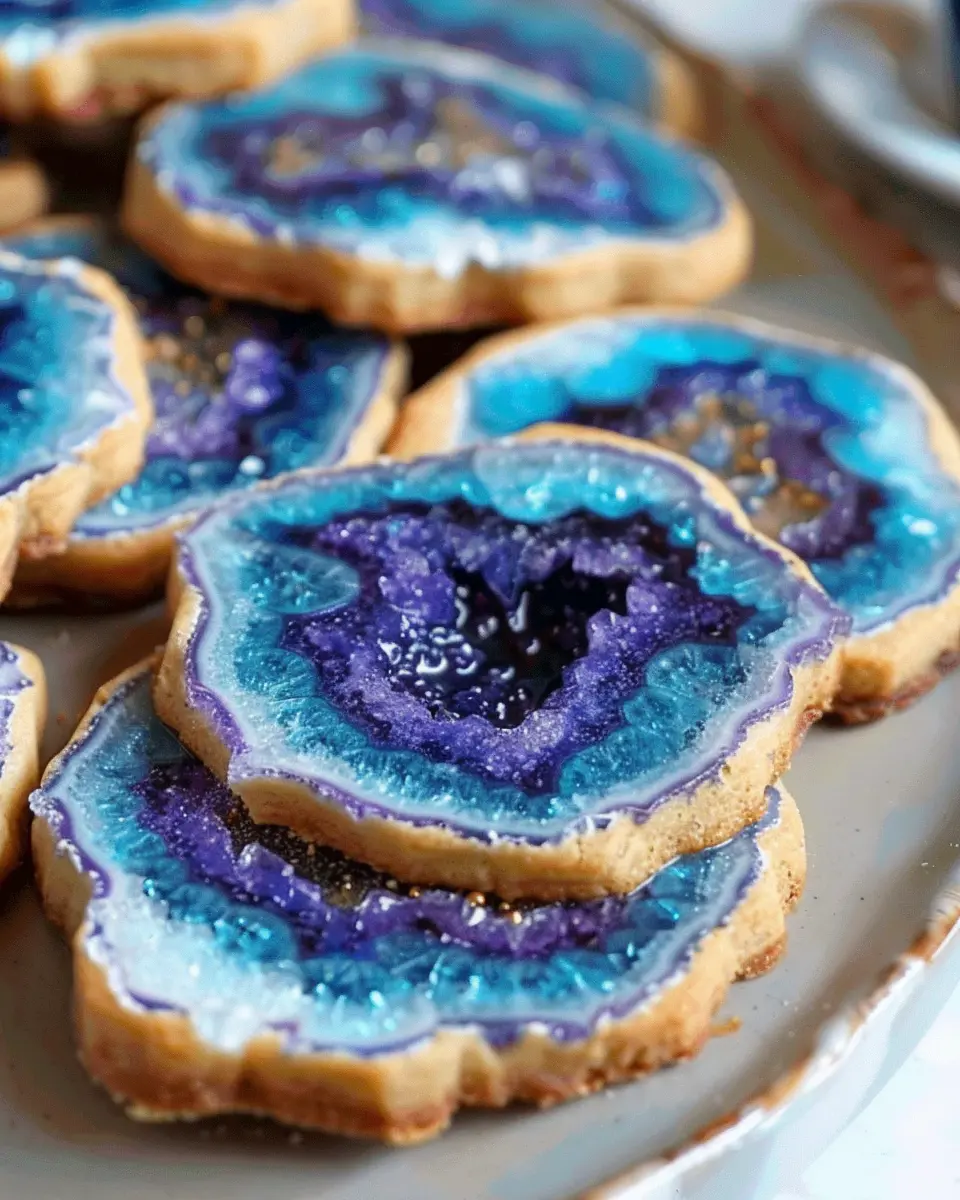
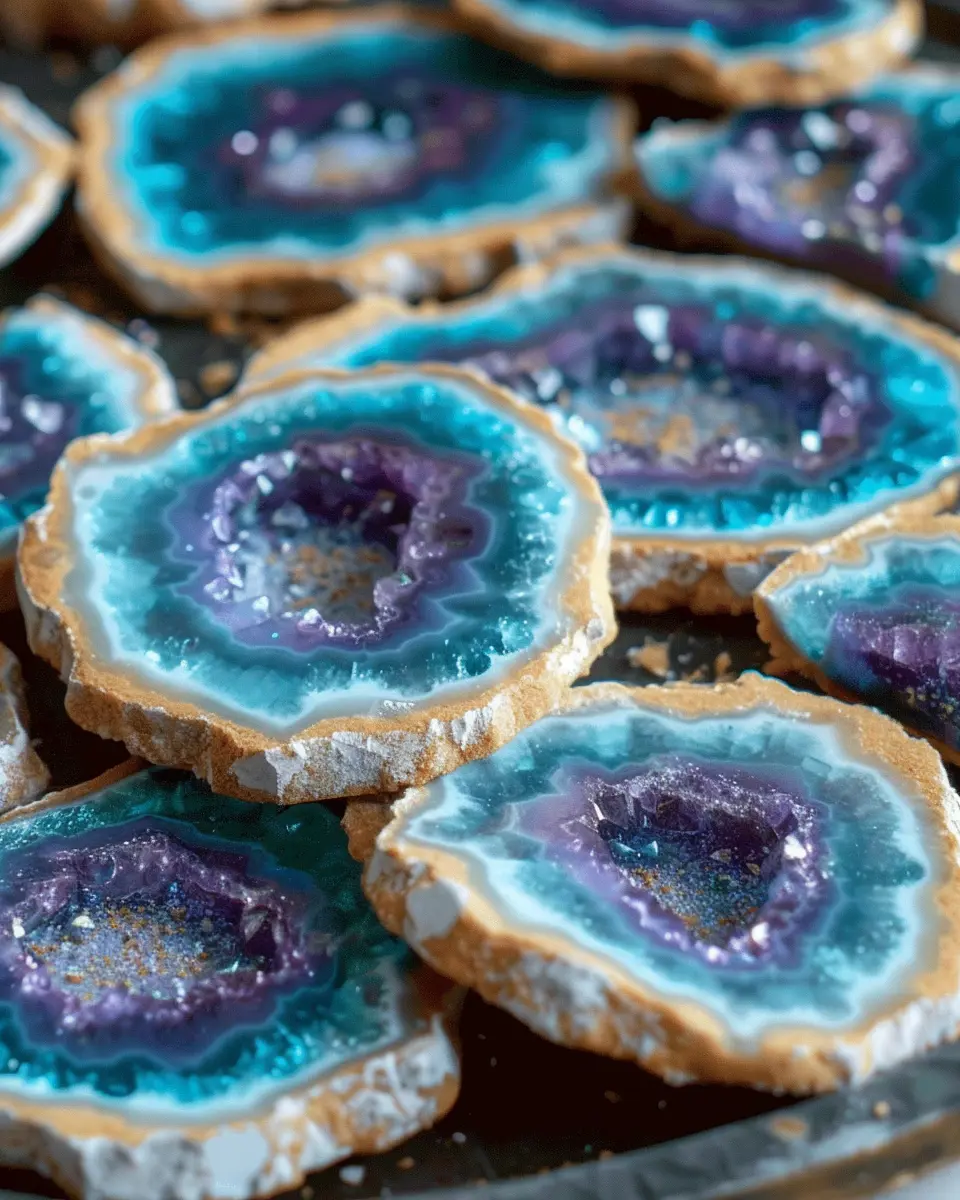
If you haven’t heard of geode cookies, you’re in for a treat—literally! These stunning, jewel-like delights are more than just cookies; they are a feast for the eyes. Using colored sugar crystals or edible gemstones, geode cookies mimic the intricate formations found in nature. Their vibrant colors and dynamic designs have made them a popular choice for everything from birthdays to bridal showers. Social media platforms like Instagram and TikTok are buzzing about these cookies, with hashtags like #GeodeCookies showcasing creative variations from bakers all over the world.
A brief history of cookies and their evolution
Cookies have a rich history that dates back to the 7th century AD in Persia, where they first emerged as small sweets. Fast forward to the late 19th century, cookies made their way to America with European settlers. Once a simple treat, cookies have evolved drastically, especially in the last few decades. Today, we see cookies in gourmet forms, with a myriad of flavors, fillings, and designs—geode cookies being one of the most visually appealing variations. They represent a perfect blend of art and culinary skill, illustrating how far the cookie concept has come.
Why young professionals should try making geode cookies at home
In the hustle and bustle of today’s world, hobbies like baking can provide a much-needed escape. Making geode cookies at home allows young professionals to unleash their creativity while enjoying a fun and rewarding activity. Plus, you get to nibble on your masterpieces afterward!
Here are some reasons to consider trying your hand at these cookies:
- Stress Relief: Baking can be meditative. The process of mixing, rolling, and decorating can help you unwind after a long day at work.
- Social Connection: Hosting a cookie-decorating night with friends is a fantastic way to bond and enjoy each other’s company.
- Personalization: You can tailor the flavors, colors, and decorations to your liking, making each batch uniquely yours.
If you’re feeling adventurous, check out this detailed guide to baking cookies that can help boost your skills. So, why not grab your apron and dive into the colorful world of geode cookies? You might just discover a new favorite hobby!
Ingredients for Geode Cookies
Overview of essential ingredients
Creating geode cookies is all about selecting the right ingredients to mimic the dazzling, crystal-like formations found in real geodes. You’ll need:
- Sugar cookie dough: This forms the base of your cookies. A classic sugar cookie recipe works wonders.
- Royal icing: To create the stunning, glossy surfaces that hold your candy crystals in place.
- Candy crystals: The star of the show! Various colors and sizes can help replicate that geode look.
Importance of high-quality candy crystals
When it comes to the candy crystals, quality matters. Opt for vibrant, high-quality crystals like those from specialty baking stores or online shops such as Amazon or Baking Supply Stores. The better the crystals, the more realistic and visually appealing your geode cookies will be.
Alternative options for customization
Feel like mixing things up? You can customize your geode cookies with different flavors and colors. Consider adding:
- Flavored extracts like almond or lemon to the dough for a unique twist.
- Gel food coloring to dye your royal icing for a personalized touch.
- Alternative toppings such as edible glitter or mini chocolate chips for extra flair.
By experimenting with these alternatives, you can create stunning cookies that reflect your personal style!
Preparing Geode Cookies
Creating beautiful and delicious geode cookies is an adventure for every baking enthusiast. These visually stunning treats will impress your friends and family and are surprisingly easy to make! Let’s dive into the preparation process step by step, ensuring each moment spent in the kitchen is a delightful experience.
Gather Your Ingredients and Tools
Before getting your hands floury, it’s essential to gather all your ingredients and tools. Having everything at arm’s reach will save you from mid-baking chaos! Here’s what you’ll need:
Ingredients:
- 2 ½ cups all-purpose flour
- 1 tsp baking soda
- 1 tsp baking powder
- ½ tsp salt
- 1 cup unsalted butter, softened
- 1 cup granulated sugar
- ½ cup brown sugar, packed
- 2 large eggs
- 1 tsp vanilla extract
- Candy crystals (variety of colors) for decoration
Tools:
- Mixing bowls
- Whisk
- Baking sheets
- Parchment paper
- Cookie cutters (star shapes or any other fun shapes)
- Rolling pin
Set your oven to preheat at 350°F (175°C) while you’re at it. This will give you a head start!
Make the Cookie Dough
Now it’s time to whip up that cookie dough! In a large mixing bowl, combine your dry ingredients: flour, baking soda, baking powder, and salt. Mix these together until well combined. In a separate bowl, cream the softened butter with both sugars until the mixture becomes light and fluffy. This step is vital; it helps create a cookie that’s chewy yet tender.
Next, add the eggs one at a time, followed by the vanilla extract. Continue mixing until the dough is smooth. Gradually mix in the flour mixture until fully incorporated. The consistency should be thick and a bit sticky.
Mixing in the Candy Crystals
Here comes the fun part! After your cookie dough is ready, it’s time to add in those dazzling candy crystals. These will give your geode cookies that stunning, textured appearance reminiscent of real gemstones. Feel free to experiment with different colors and sizes; the more colorful, the better!
Gently fold the crystals into your dough, ensuring they are evenly distributed. This is where your artistic flair will shine; as you bring these geodes to life, visualize how they will look after baking!
Portioning and Shaping the Cookies
Now that your dough is blinged-out, it’s time to portion and shape the cookies. Use a cookie scoop or tablespoon to form equal-sized balls of dough. Leave some space between each on your parchment-lined baking sheet, as they will spread while baking.
For that geode effect, lightly press the top of each ball to flatten slightly and create a base for the candy crystals to somewhat “burst” out from when they bake.
Baking to Perfection
Pop those trays in the preheated oven! Bake the cookies for about 10 to 12 minutes, or until the edges are lightly golden. Remember, cookies continue cooking a bit after you take them out, so don’t overbake. This technique helps preserve that chewy center you want in your geode cookies.
Cooling and Final Steps
Once baked, remove the cookies from the oven and allow them to cool on the baking sheet for a couple of minutes. This step is crucial because they’ll firm up as they cool down. Then, transfer them to a wire rack to cool completely.
At this point, take a moment to revel in your creation. You’ve not only made a tasty treat but also a feast for the eyes! These cookies can be stored in an airtight container for about a week—if they last that long!
With these straightforward steps, the delightful journey of baking your geode cookies is just about to begin. Dive in boldly—your friends and family will love showing off their edible gemstone creations!
Variations on Geode Cookies
Creating geode cookies is a delightful way to express your creativity in baking! Here are some fun variations you can try to make these treats even more special for different occasions.
Color Variations for Different Themes
The beauty of geode cookies lies in their vibrant colors. You can customize them to fit any theme you desire. For a spring celebration, consider pastel shades like soft pinks and blues. During the holidays, opt for deep reds and greens, or go all out with sparkling gold and silver for a New Year’s bash. You can achieve these stunning visuals by using gel food coloring, which gives your royal icing a rich and intense palette.
Flavor Variations: Different Extracts and Add-Ins
Why stick to traditional flavors? Experimenting with different extracts can completely change the taste of your geode cookies. Here are some ideas:
- Vanilla: A classic option that pairs perfectly with most frostings.
- Almond Extract: Adds a nutty depth, perfect for complementing fruit-flavored accents.
- Lemon Zest: Brightens the palette and adds a zingy freshness.
Additionally, feel free to add in bits of dried fruit or nuts for a delightful crunch.
Decorating Tips for a Stunning Presentation
Presenting your geode cookies beautifully makes all the difference. Start with a smooth layer of royal icing as your base. Then, use varying shades of icing to create the geode effect, layering the colors for depth. Don’t forget to add edible glitter or shimmer dust for that extra sparkle! Consider also using a toothpick to create small cracks for a more authentic geode look.
With these variations, your geode cookies are sure to steal the show at any gathering! For more inspiration on cookie decorating techniques, check out Bakerella’s expert tips here.
Baking notes for Geode Cookies
Common pitfalls to avoid
When crafting geode cookies, it’s essential to steer clear of a few common mistakes:
- Overmixing your dough: This can result in tough cookies rather than soft and chewy delights.
- Skipping the chilling step: Chilling the dough allows the flavors to meld and prevents spreading. Trust the process; it’s worth the wait!
- Using stale ingredients: Always check that your baking soda and baking powder are fresh for the best rise and texture.
Tips for achieving the perfect texture
To attain that ideal cookie consistency, consider the following:
- Use cold butter: Cold butter helps maintain the shape of your cookies. For best results, let it sit at room temperature for just a few minutes to soften slightly without melting.
- Experiment with mix-ins: Don’t shy away from adding sea salt, or chocolate chips. They can enhance the flavor profile of your geode cookies significantly.
How to store cookies for freshness
To keep your geode cookies delectable, store them in an airtight container at room temperature. If you’re planning to enjoy them later, freezing is a great option! Just make sure to separate layers with parchment paper and seal them well. They can last up to three months in the freezer without losing that delicious texture.
By keeping these tips in mind, you’ll elevate your cookie game and impress your friends and family. For more baking insights, check out resources like King Arthur Baking or Serious Eats to expand your skills!
Serving Suggestions for Geode Cookies
Best Occasions for Showcasing These Cookies
Geode cookies are truly versatile! Their stunning appearance makes them perfect for a variety of events, including:
- Birthday parties
- Weddings and bridal showers
- Baby showers and gender reveal events
- Holiday gatherings
- Dessert tables for special occasions
Their unique beauty is sure to spark conversations and add charm to any celebration.
Pairing Ideas with Beverages and Other Treats
When it comes to enjoying your geode cookies, consider these delightful pairings:
- Herbal teas like chamomile or mint offer a calming balance to the sweet cookies.
- Sparkling water or flavored seltzers provide a refreshing contrast.
- For a savory touch, try pairing cookies with light cheese and fruit platters. A creamy Brie or a tangy goat cheese complements the sweetness beautifully.
Plating and Presentation Tips
To dazzle your guests further, focus on presentation:
- Use a white or pastel platter to make the colors pop.
- Top with edible glitter or gold leaf for that extra sparkle.
- Arrange cookies in layers, mixing sizes and colors for a visually striking display.
For more creative plating ideas, check out this article on food styling.
Incorporating these elements will elevate your geode cookies from simply delightful to a centerpiece of any gathering!
Time details for Geode Cookies
Preparation time
Getting ready to make your geode cookies is a breeze! You’ll need about 25-30 minutes to prepare your dough and any decorations. This includes gathering your ingredients and letting your creative juices flow as you shape the cookies.
Baking time
After the prep work, it’s time to bake those beauties! The cookies will take approximately 10-12 minutes in the oven. Keep an eye on them; you want them to be golden but not overdone.
Total time commitment
In total, you can expect to spend about 40-45 minutes to whip up a batch of these stunning geode cookies. Having friends over? These are sure to impress! Remember, if you want to explore more creative ideas, check out reliable resources like Food Network or Bon Appétit for inspiration. Happy baking!
Nutritional information for Geode Cookies
Overview of calories and key nutrients
Indulging in geode cookies offers a delightful treat that combines fun designs with a satisfying taste. Typically, each cookie packs around 120-150 calories and boasts essential nutrients such as carbohydrates, fats, and proteins. The sugar content can vary, especially based on the candy used for decoration. To keep them balanced, consider using dark chocolate or natural sweeteners like honey. For more detailed nutritional insights, check out the USDA’s food database for specific ingredients.
Tips for making them lighter
Want to enjoy geode cookies with a lighter twist? Here are some practical ideas:
- Substitute regular flour with almond or coconut flour for a lower-carb option.
- Use less sugar by reducing the quantity or opting for alternatives like maple syrup or stevia.
- Incorporate whole grains like whole wheat flour for added fiber and nutrients.
By making simple swaps, you can savor the beauty and flavor of these delightful cookies without the guilt!
FAQs about Geode Cookies
Can I make these cookies ahead of time?
Absolutely! Geode cookies can be prepared in advance, which makes them perfect for parties or surprise guests. You can bake the cookies and store them in an airtight container for up to a week. For the best taste, consider adding the candy crystals just before serving. If you want to get really organized, you can also freeze the cookie dough. Just shape the cookies, freeze them on a baking sheet, and then transfer them to a zip-top bag once solid. When you’re ready to bake, pop them directly into the oven without thawing—just add a couple of extra minutes to the baking time.
What can I substitute for the candy crystals?
If you don’t have the ideal candy crystals on hand, don’t worry! Here are some fun alternatives to consider:
- Rock candy is the most authentic substitute; it mimics the geode look beautifully.
- Jelly beans can offer vibrant colors while still maintaining an appealing texture.
- You could even use crushed hard candies like Jolly Ranchers for that sparkly effect—just crush them before adding.
Need more inspiration? Check out this article on common baking substitutions.
How do I store leftover cookies?
Leftover geode cookies should be stored properly to maintain their stunning appearance and delicious flavor. Use an airtight container to keep them fresh. If you’re worried about the candy crystals getting sticky, you might want to layer parchment paper between the cookies. They can last for about five days at room temperature or up to two weeks in the fridge. Just remember that refrigeration can alter the texture slightly, but they’ll still taste amazing!
Conclusion on Geode Cookies
Recap of why geode cookies are a must-try
In a world filled with visually stunning desserts, geode cookies stand out for their unique beauty and delightful taste. These cookies not only impress at gatherings but also allow you to indulge your creativity. The combination of vibrant colors and textures is sure to make your dessert table unforgettable.
Encouragement to get creative with the recipe
Don’t hesitate to experiment! Swap out colors or textures, or even add some fun flavors to your geode cookies. You could try incorporating citrus zest for a refreshing twist or explore different types of edible glitter. The only limit is your imagination. For inspiration, visit sites like Taste of Home or Bakerella for more creative cookie ideas. So roll up your sleeves and get baking—these cookies are waiting to dazzle your taste buds and those of your friends!
PrintGeode Cookies: Easy Recipe for Stunning Edible Gems

Learn how to make stunning geode cookies that resemble edible gems. This easy recipe will impress your guests and satisfy your sweet tooth.
- Prep Time: 30 minutes
- Cook Time: 12 minutes
- Total Time: 42 minutes
- Yield: 24 cookies 1x
- Category: Dessert
- Method: Baking
- Cuisine: American
Ingredients
- 2 cups all-purpose flour
- 1 cup unsalted butter, softened
- 1 cup granulated sugar
- 2 large eggs
- 1 teaspoon vanilla extract
- 1/2 teaspoon baking powder
- 1/4 teaspoon salt
- 1 cup royal icing
- food colors (various)
- edible glitter (optional)
Instructions
- Preheat the oven to 350°F (175°C).
- In a bowl, cream together butter and sugar until light and fluffy.
- Add eggs and vanilla extract, mixing well.
- In a separate bowl, combine flour, baking powder, and salt.
- Gradually add dry ingredients to the wet mixture, stirring until just combined.
- Roll dough into balls and place them on a baking sheet.
- Bake for 10-12 minutes or until edges are lightly golden.
- Let cookies cool before decorating with royal icing.
- Add food colors and edible glitter to mimic geode crystals.
Notes
- For best results, chill the dough for 30 minutes before baking.
- You can use different cookie shapes for a varied design.
Nutrition
- Serving Size: 1 cookie
- Calories: 150
- Sugar: 10g
- Sodium: 150mg
- Fat: 8g
- Saturated Fat: 5g
- Unsaturated Fat: 2g
- Trans Fat: 0g
- Carbohydrates: 20g
- Fiber: 0g
- Protein: 2g
- Cholesterol: 30mg
Keywords: Geode Cookies, Edible Gems, Cookie Recipe