
Introduction to Earthquake Cake Recipe
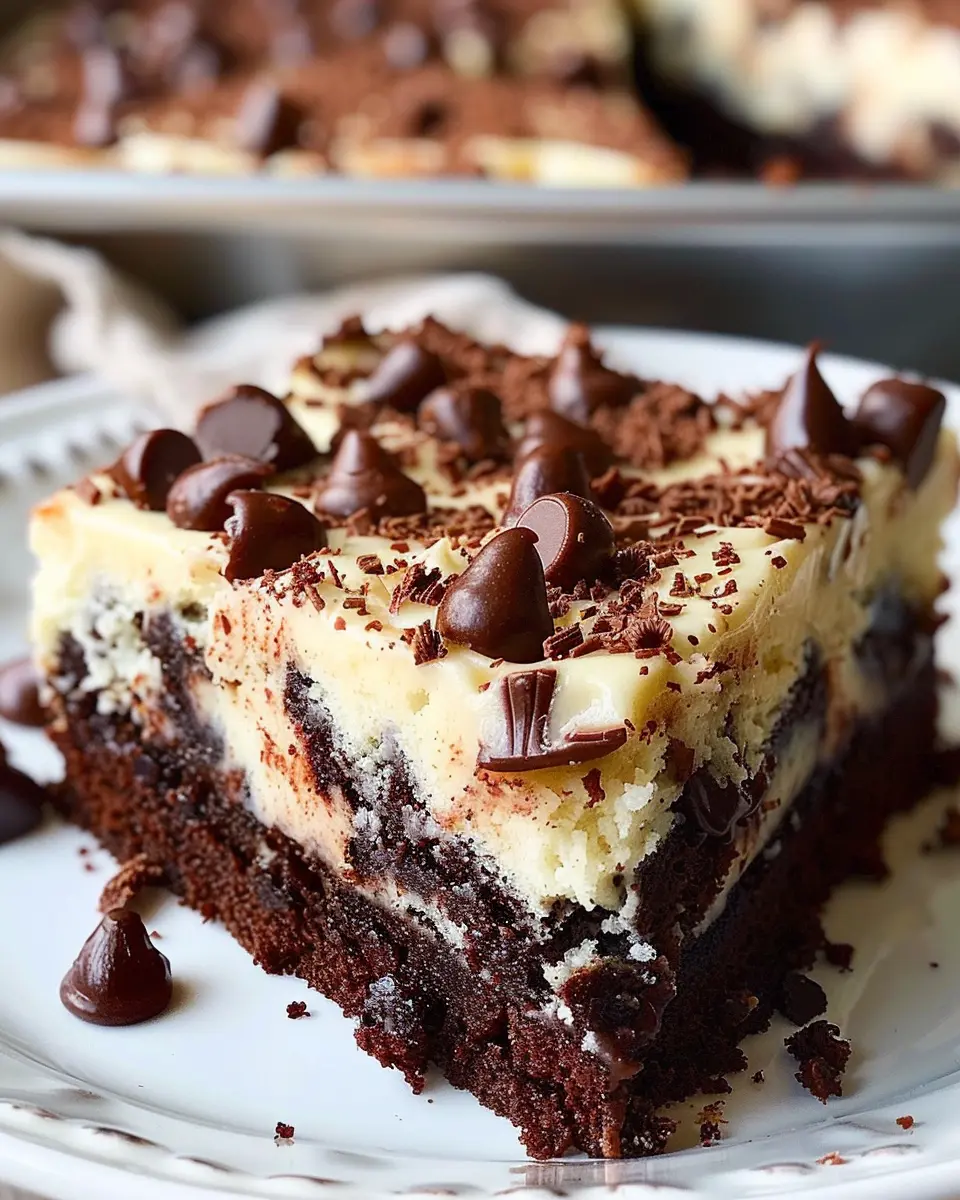
Earthquake cake is not just a dessert; it’s a delicious experience that combines a moist chocolate cake with a delightful surprise of cream cheese and chocolate chips. If you’re looking to impress your friends at a gathering or simply want to indulge in a treat that’s both comforting and decadent, this recipe is your best bet.
Why Choose a Homemade Earthquake Cake?
There are plenty of reasons to dive into making your own earthquake cake recipe. First and foremost, nothing compares to the satisfaction of baking something from scratch. When you open your oven to reveal a beautifully risen cake, the feeling of accomplishment is unparalleled. Plus, you can control the ingredients—no preservatives or artificial flavors, just pure goodness.
-
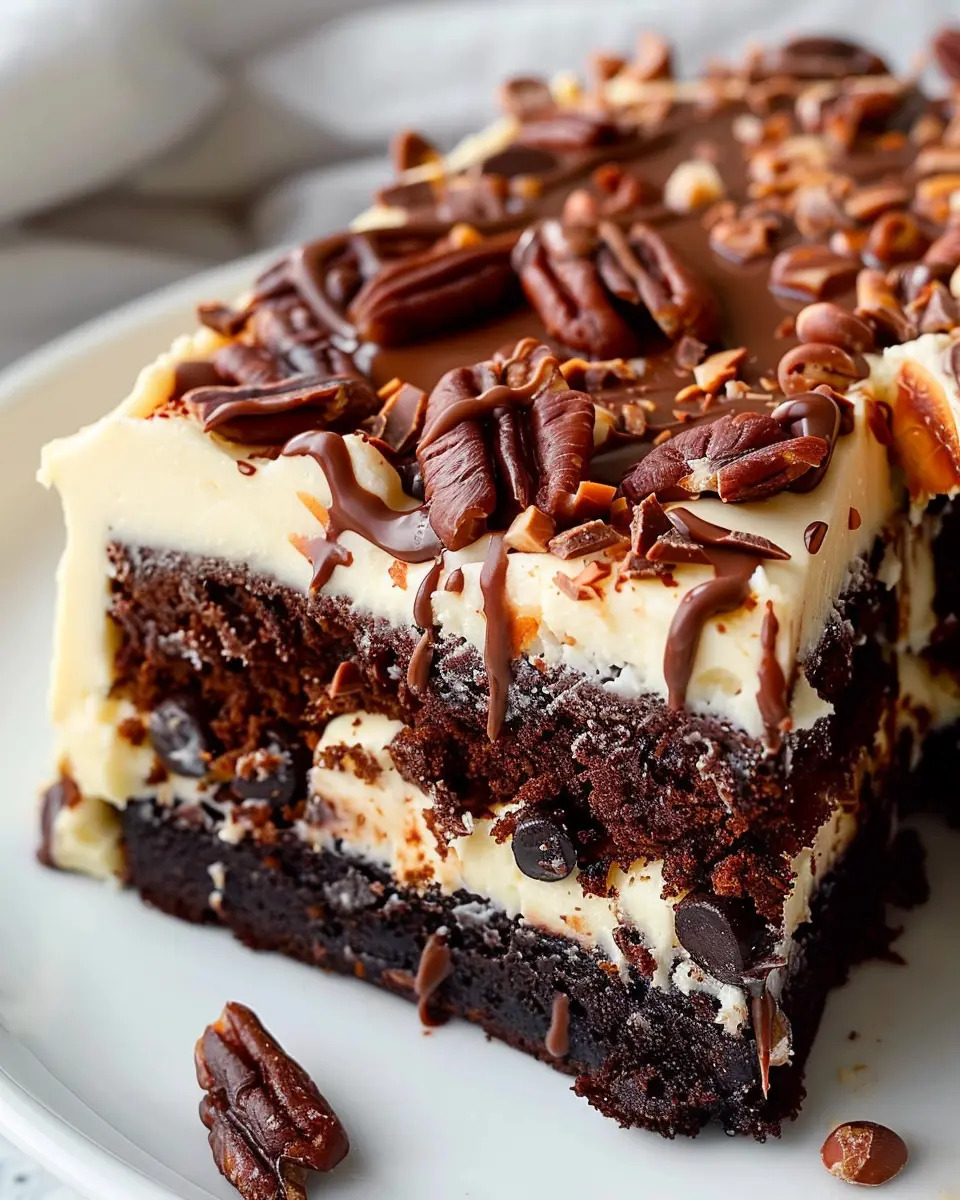
Personal Touch: When you create your cake at home, you can add your unique spin. Want more chocolate chips? Go for it! Prefer a nutty flavor? Toss in some walnuts or pecans. The possibilities are endless.
-
Healthier Alternatives: By making your cake yourself, you can substitute certain ingredients to meet your dietary needs. For instance, you might want to swap out regular chocolate chips for dark chocolate, which can provide antioxidants and a slightly richer flavor.
-
Fun with Friends: Baking can be an enjoyable group activity. Get your friends involved; they’ll love helping to mix batter or decorate the finished product. It’s a great way to bond and create memories.
-
Incredible Aroma: There’s something magical about the aroma of a baking cake wafting through your home. It creates a warm and inviting atmosphere that’s perfect for gatherings or just a cozy evening in.
If you’re interested in more baking ideas, check out sites like Bon Appétit or The Kitchn for creative inspiration.
So, whether you’re a seasoned baker or just starting, this earthquake cake recipe is sure to please. With your friends and family gathered around, you’ll all be eagerly awaiting that first slice!
Ingredients for Earthquake Cake
Creating a delicious earthquake cake is all about gathering the right ingredients. This cake is bursting with flavor and texture, resulting in a delightful treat that’s perfect for any occasion. Here’s what you’ll need:
- Chocolate Cake Mix: Start with your favorite box mix for ease, or go homemade for an extra touch.
- Eggs: Two large eggs will help bind everything together.
- Water: Use around a cup to bring your cake mix to life.
- Turkey Bacon: For those who enjoy a smoky flavor, adding turkey bacon brings a unique twist to this cake.
- Chicken Ham: A great complement to the cake, it provides a savory depth.
- Beef: Incorporating beef adds a hearty richness, making each bite incredibly satisfying.
- Cream Cheese: A block of cream cheese, softened, for a luscious filling.
- Powdered Sugar: About 1 cup, to sweeten up the cream cheese mixture.
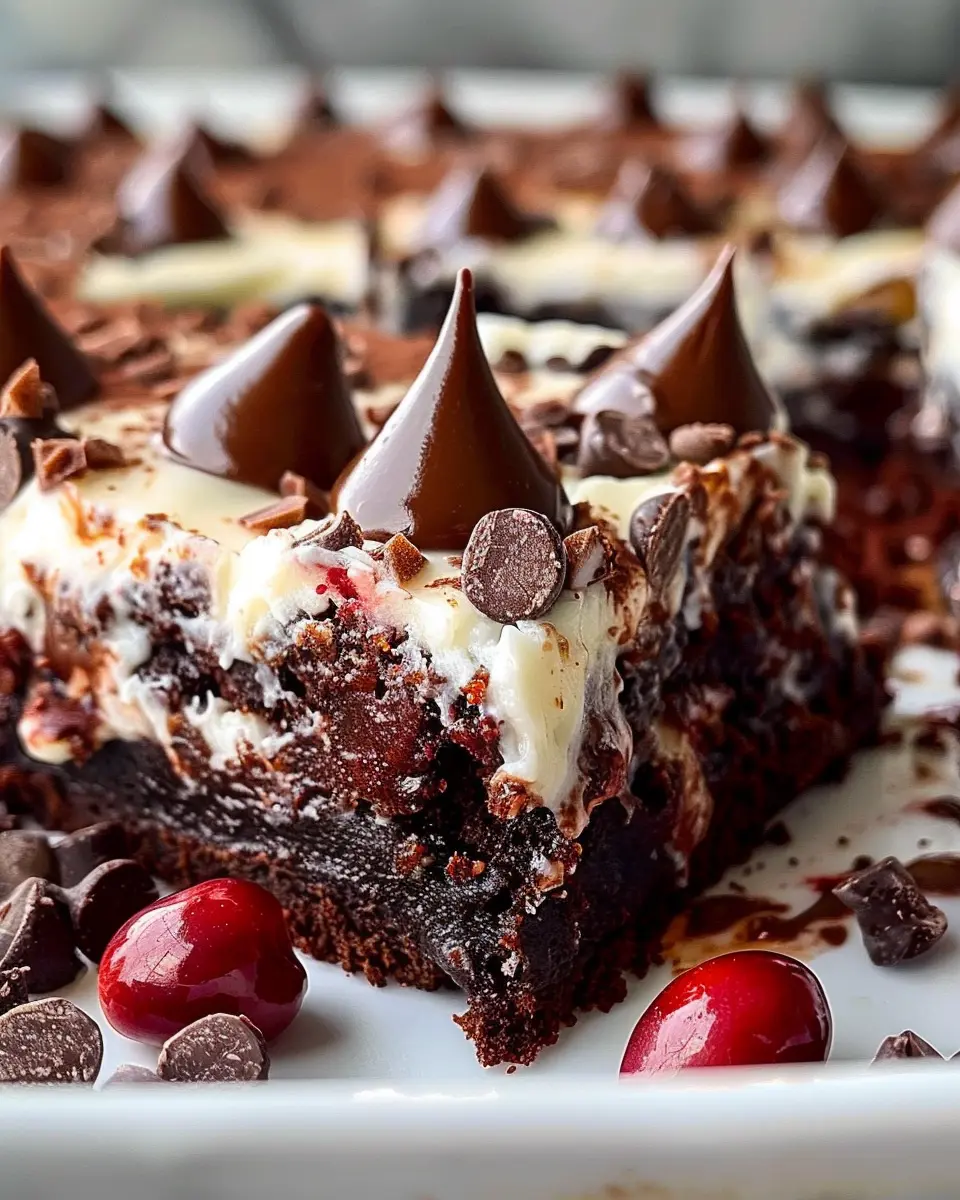
- Chocolate Chips: A generous sprinkle of chocolate chips on top for that irresistible finish.
If you want to learn more about different flavor variations, check out this guide to cake flavors. Enjoy exploring the unique taste profile as you create your personal take on this beloved earthquake cake recipe!
Step-by-step Preparation for Earthquake Cake
When it comes to baking, especially a delightful treat like earthquake cake, having a clear plan can make all the difference. This cake, known for its rich flavors and distinct texture, requires just a few steps to bring it to life! Let’s dive into how you can prepare this delightful dessert with ease.
Gather Your Ingredients
The first step in any baking adventure is to round up your ingredients. Here’s what you’ll need for an amazing earthquake cake:
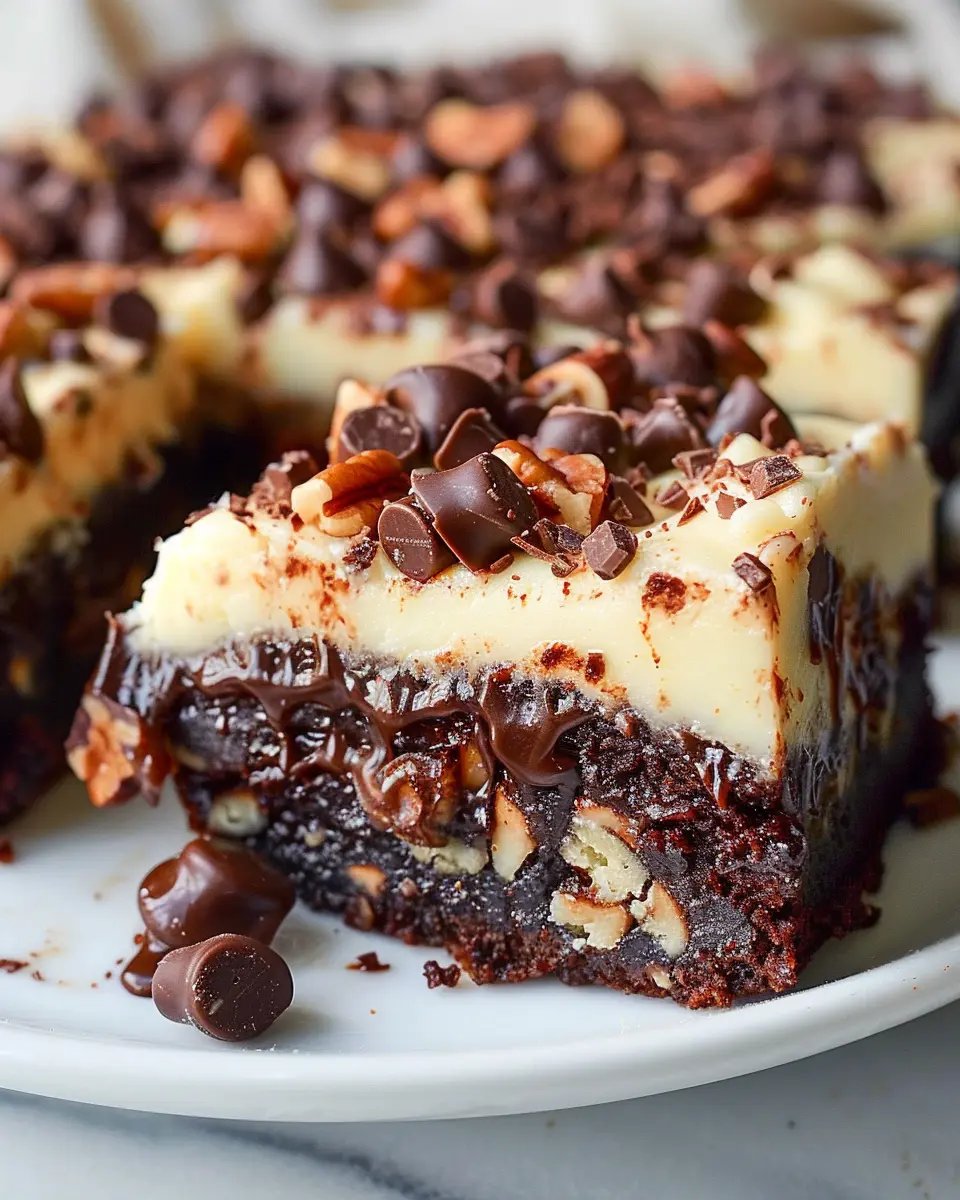
- 1 cup of shredded coconut
- 1 cup of chopped nuts (walnuts or your preferred type)
- 1 box of German chocolate cake mix
- 1 cup of turkey bacon, chopped
- 8 oz cream cheese
- 1/2 cup of butter, softened
- 1 cup of powdered sugar
- 1 cup of water
Make sure to have everything measured out and ready to go—this will save you time and hassle later! If you’re curious about the nutritional benefits of these ingredients, sites like the USDA FoodData Central can provide detailed information.
Prepare the Baking Dish
Next up, you’ll want to make your baking dish ready for action. Grab a 9×13 inch baking pan and apply a generous coat of non-stick spray or butter it well to prevent sticking. Some bakers also like to line the bottom with parchment paper for an even easier release. This small step can save you from the heartbreak of a stuck cake!
Mix the Cake Batter
Now, let’s get into mixing that delicious cake batter! In a large mixing bowl, combine the German chocolate cake mix with water, following the package instructions. Typically, you’ll stir until just combined—no need to overmix! Once your batter is smooth, fold in the shredded coconut and chopped turkey bacon for an extra kick of flavor and texture. The combination of sweetness from the coconut and the savory notes from the turkey bacon is what makes this earthquake cake recipe so uniquely delightful.
Prepare the Cream Cheese Swirl
While your cake batter is resting, let’s whip up a creamy swirl that takes the cake to new heights! In another bowl, mix the softened cream cheese and 1/2 cup of butter until smooth. Gradually add in the powdered sugar and mix until well blended. If you want to add a touch of flavor, a dash of vanilla extract can really enhance the profile of your swirl.
Combine and Bake
With your batter and cream cheese mixture ready, it’s time for the exciting part! Pour half of the cake batter into your prepared baking dish. Then, dollop the cream cheese mixture over the batter using a spoon. The next step is crucial: pour the remaining batter on top, ensuring that the cream cheese swirl look remains somewhat intact. This allows for the “earthquake” effect as the cake bakes!
Once everything is layered perfectly, pop your cake into a preheated oven at 350°F (175°C) for about 30-35 minutes, or until a toothpick comes out clean.
And there you have it! Let your cake cool before serving; it’s equally delicious warm or at room temperature. This cake is perfect for gatherings, as each slice can be a conversation starter about its unexpected combinations and flavors. Don’t forget to share your creation; maybe take a photo for your Instagram page—who can resist?!
If you’re looking for inspiration or adjustments to this recipe, check out sites like America’s Test Kitchen or BBC Good Food for additional twists on classic cakes. Happy baking!
Variations on Earthquake Cake
When it comes to the earthquake cake recipe, the foundation is timeless—but that doesn’t mean we can’t have some fun with it! Let’s explore a couple of variations that will satisfy different cravings and dietary needs.
Chocolate Chip Variations
If you’re a chocolate lover, adding chocolate chips is a game-changer. Simply fold in a cup of semi-sweet or dark chocolate chips into the batter before pouring it into the pan. This twist amplifies the chocolate flavor, creating a gooey, rich texture that pairs beautifully with the cream cheese layer. You can even experiment with flavored chocolate chips, like mint or raspberry, for a surprising taste profile that adds a personal touch to your earthquake cake recipe.
Nut-Free Options
For those with nut allergies, fear not! You can easily tweak your earthquake cake recipe to be nut-free. Simply omit any nuts from the recipe. Instead, consider swapping in sunflower seeds for a little crunch without the allergen. Additionally, using seeds will add a subtle, nutty flavor without the worry. If you’re looking for extra flavor, a sprinkle of cinnamon or a dash of espresso powder can elevate your cake, creating a warm, inviting aroma as it bakes.
The beauty of this recipe lies in its versatility. You can customize it according to your preferences, leaving you with a dessert that feels uniquely yours. For more innovative ideas, check out Serious Eats or Bon Appétit for inspiration! Happy baking!
Cooking Tips and Notes for Earthquake Cake
When diving into your earthquake cake recipe, a few helpful tips can elevate your dessert game to the next level. First, ensure your ingredients are at room temperature. This makes mixing easier and helps create a lighter texture.
-
Storage: Leftover cake can be stored in an airtight container in the refrigerator for up to a week. But trust me, no one will want to wait that long to indulge again!
-
Variations: Want to mix things up? Consider adding nuts or different chocolate varieties. This not only enhances the flavor but adds a fun twist.
-
Presentation: A dusting of powdered sugar or a drizzle of chocolate sauce on top can make your earthquake cake look just as good as it tastes. Remember, we eat with our eyes first!
Cooking is about experimentation, so don’t be afraid to tweak the recipe as you see fit. For more baking tips, check out resources like King Arthur Baking or America’s Test Kitchen for solid advice. Happy baking!
Serving Suggestions for Earthquake Cake
Elevate your enjoyment of this delightful earthquake cake recipe with these serving suggestions that will impress your friends and family!
Perfect Pairings
- Whipped Cream: A dollop of sweetened whipped cream adds a delightful creaminess that contrasts beautifully with the rich chocolate.
- Ice Cream: Try vanilla or cookies and cream ice cream on the side. The cold creaminess balances the warm, dense cake perfectly.
- Fresh Berries: A handful of blueberries or strawberries not only adds a pop of color but also a refreshing burst of flavor that cuts through the cake’s sweetness.
Storage Tips
To keep your earthquake cake fresh, store it in an airtight container at room temperature for up to three days. It also freezes well—just wrap it tightly and enjoy it later!
Make It a Celebration
Serve your earthquake cake with a personalized touch for celebrations! Consider plating it with a drizzle of chocolate sauce or a sprinkle of powdered sugar for a chic look.
These ideas will not only enhance your dessert but also make your gatherings that much sweeter. For a deeper dive into flavor combinations, check out resources from The Kitchn or Food Network for more tips on serving your cakes!
Time Breakdown for Earthquake Cake
When diving into this earthquake cake recipe, understanding the time commitment can help you prepare and enjoy the process. Here’s a quick overview to guide you:
Preparation Time
Getting everything ready for your cake usually takes about 20 minutes. This includes gathering your ingredients, mixing the batter, and prepping your baking dish. It’s a great idea to work with a friend — crafting this cake is a fun experience to share!
Baking Time
You’ll want to let your masterpiece bake for 45 minutes. The wonderful aroma of chocolate and cream cheese will fill your kitchen as it cooks!
Total Time
In total, you’re looking at about 1 hour and 5 minutes from start to finish. Considering the delicious reward at the end, this investment of time is absolutely worth it! For tips on prepping ahead or storing your cake, check out this helpful guide that discusses popular baking techniques.
Now, roll up your sleeves and get ready to create something truly special!
Nutritional Facts for Earthquake Cake
When it comes to indulgent desserts like earthquake cake, knowing the nutritional facts can help you enjoy it mindfully. Here’s a quick breakdown:
Calories
A slice of this decadent cake typically contains around 400 calories. It’s a delightful treat, perfect for special occasions or when you’re craving something sweet after a long week.
Sugar Content
With around 30 grams of sugar per slice, this earthquake cake recipe is definitely a dessert to savor. It’s packed with sweetness that can brighten up your day but be mindful of that sugar rush!
Protein
On the protein front, you can expect about 4 grams per serving. While it’s not a protein powerhouse, it’s a comforting way to satisfy your sweet tooth without guilt.
For those keen on nutrition, sites like Healthline or NutritionData provide further insights into the components of your favorite foods. So, whether you’re making this earthquake cake for a gathering or just for yourself, enjoy every bite with knowledge in hand!
FAQs about Earthquake Cake
Can I use a different cake mix?
Absolutely! One of the joys of this earthquake cake recipe is its versatility. While chocolate cake mix is the most common choice, you can definitely experiment with other flavors. For example, a vanilla or spice cake mix can provide a delightful twist. Just keep in mind that altering the flavor may change the overall taste profile of the cake, so pick a mix that you truly enjoy!
How do I store leftover earthquake cake?
Storing leftover earthquake cake is a breeze! Simply cover it tightly with plastic wrap or place it in an airtight container. It can be kept at room temperature for about 2-3 days, but if you want to prolong its freshness, you can refrigerate it for up to a week. When you’re ready to enjoy a slice, let it sit at room temperature for a bit or pop it in the microwave for a few seconds to bring back its moist texture.
Is it possible to make this cake gluten-free?
Yes, you can definitely make this cake gluten-free! Just substitute the regular cake mix with a gluten-free cake mix, which is widely available in most grocery stores. Additionally, make sure to check that your cream cheese and other ingredients are labeled gluten-free. This way, everyone can enjoy the deliciousness of your earthquake cake, regardless of dietary restrictions.
For more tips on gluten-free baking, feel free to check out resources like Gluten-Free Living, which offer fantastic advice and recipes.
Whether you’re a seasoned baker or trying out this earthquake cake recipe for the first time, knowing the answers to these common questions can help you achieve a baking masterpiece!
Conclusion on Earthquake Cake Recipe
In summary, the earthquake cake recipe is not just a delightful dessert; it’s an experience that brings people together. Its rich layers of chocolate and nuts create a harmonious blend that even your pickiest friends will adore. Plus, it’s so easy to make—perfect for the busy young professional!
By following our step-by-step guide, you’ll nail this cake and impress at your next gathering. For a fun twist, consider experimenting with different fillings or toppings. If you enjoyed this recipe, check out more on dessert creativity at Food Network. Happy baking!
PrintEarthquake Cake Recipe: Indulgent Comfort with a Twist

A delectable Earthquake Cake that combines chocolate and coconut for a unique treat.
- Prep Time: 15 minutes
- Cook Time: 45 minutes
- Total Time: 1 hour
- Yield: 12 servings 1x
- Category: Dessert
- Method: Baking
- Cuisine: American
Ingredients
- 1 cup chopped walnuts
- 1 cup shredded coconut
- 1 box chocolate cake mix
- 1 cup cream cheese
- 1 cup powdered sugar
- 1/2 cup vegetable oil
- 1 cup water
Instructions
- Preheat your oven to 350°F (175°C).
- Grease a 9×13 inch baking dish.
- Spread walnuts and coconut on the bottom of the dish.
- In a bowl, mix the cake mix, oil, and water until combined.
- Pour the cake batter over the nuts and coconut.
- In another bowl, beat the cream cheese and powdered sugar until smooth.
- Drop spoonfuls of the cream cheese mixture on top of the cake batter.
- Swirl gently with a knife.
- Bake for 40-45 minutes or until a toothpick comes out clean.
Notes
- Serve warm or at room temperature for best flavor.
Nutrition
- Serving Size: 1 slice
- Calories: 320
- Sugar: 28g
- Sodium: 350mg
- Fat: 15g
- Saturated Fat: 5g
- Unsaturated Fat: 8g
- Trans Fat: 0g
- Carbohydrates: 42g
- Fiber: 2g
- Protein: 4g
- Cholesterol: 30mg
Keywords: Earthquake Cake, chocolate cake, dessert