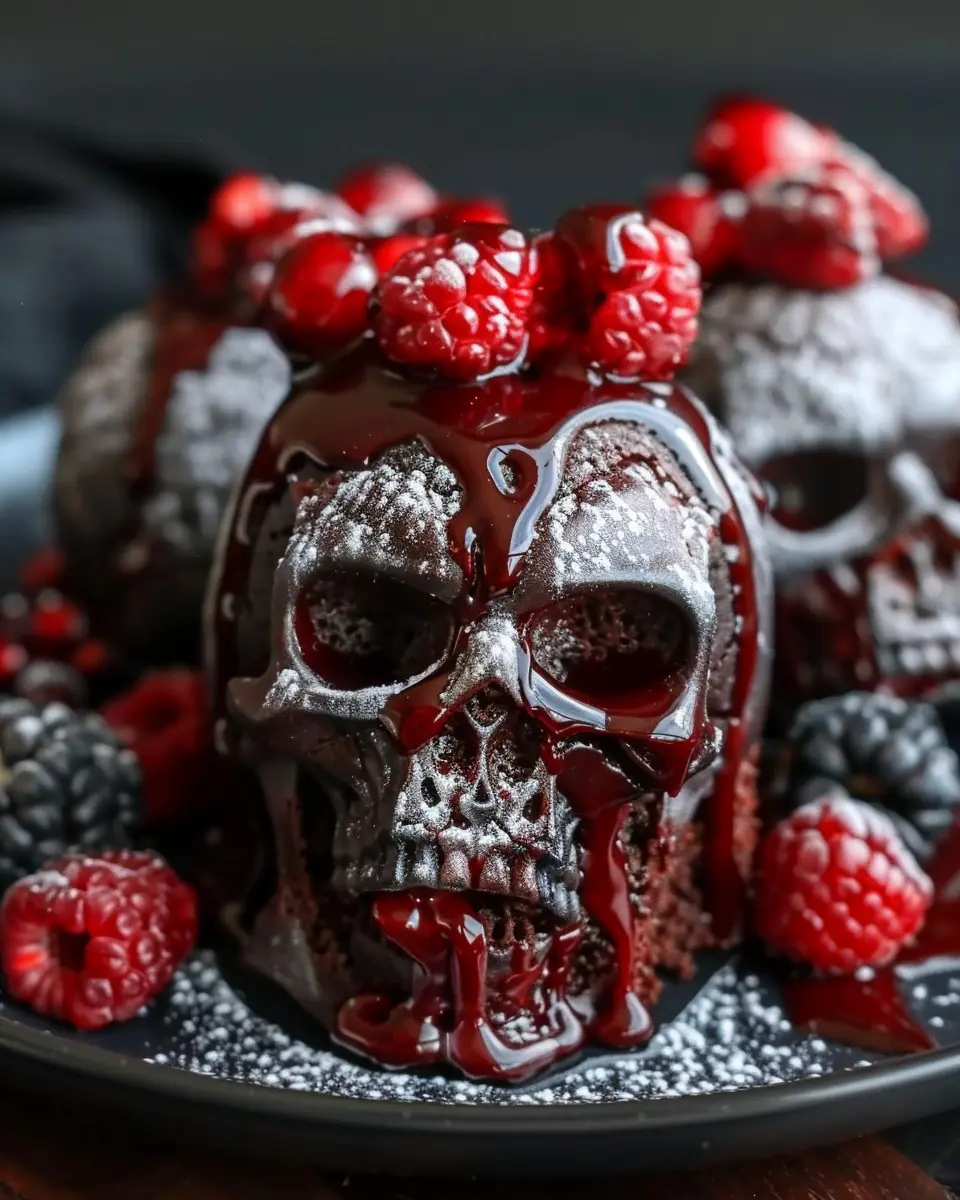
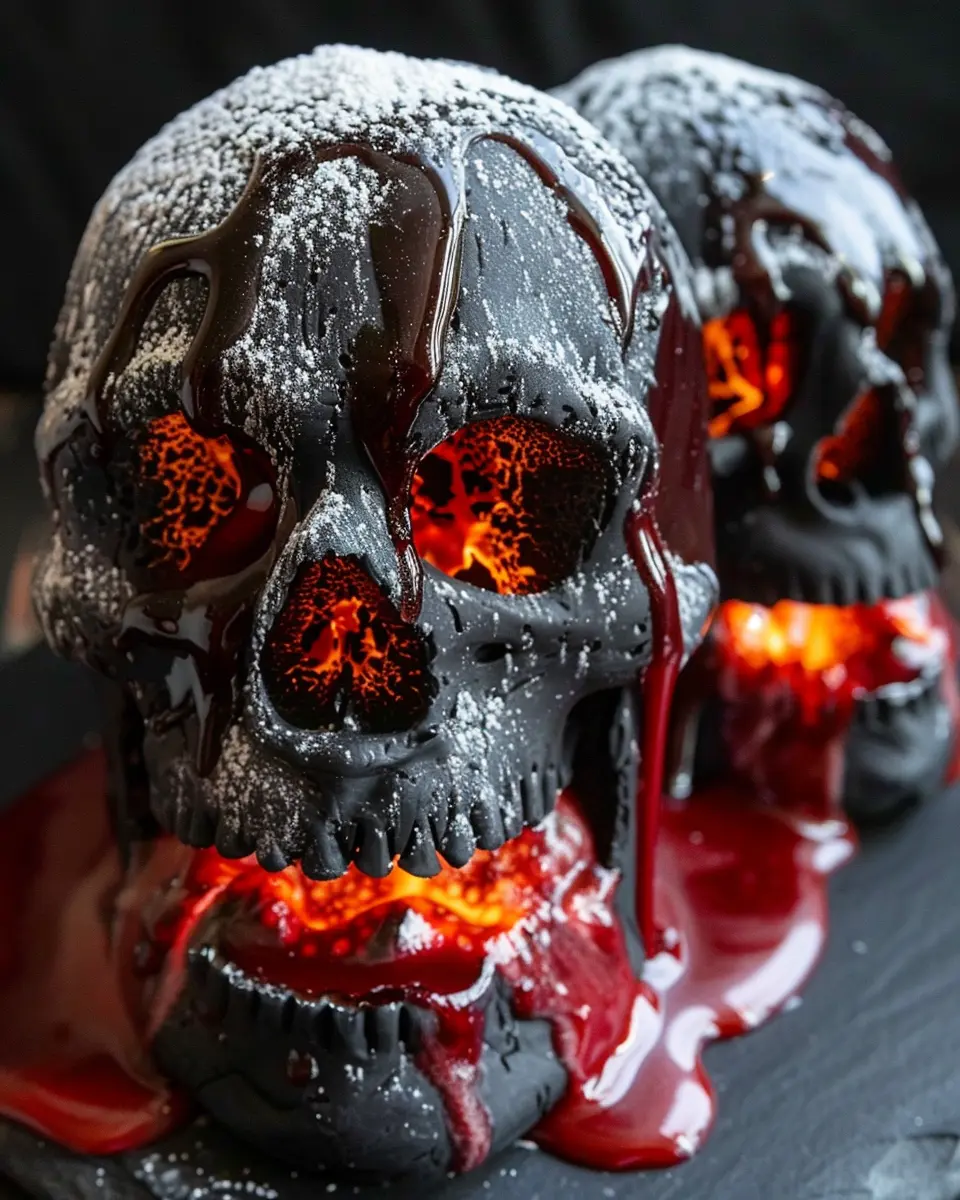
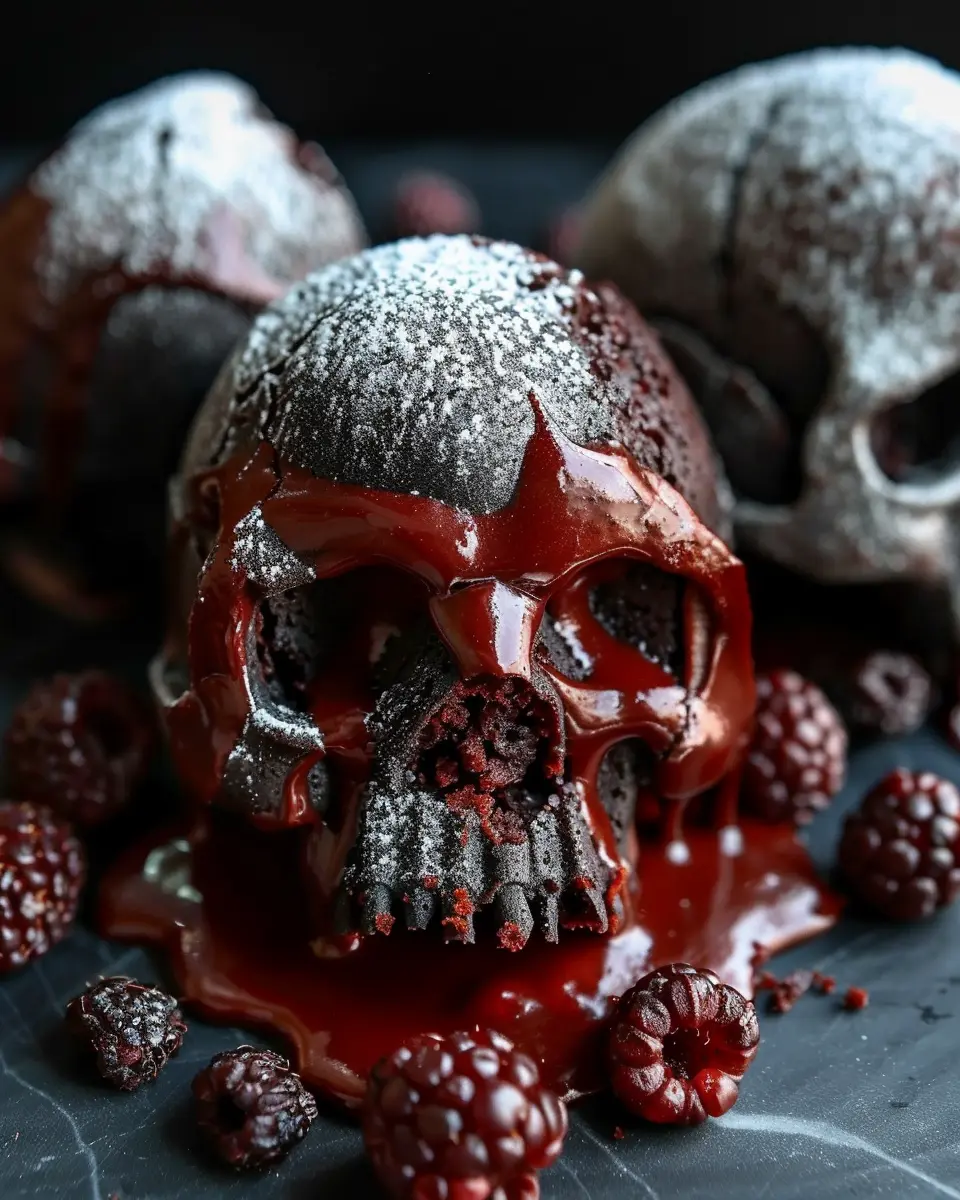
Introduction to Skull Lava Cake
If you’re a young professional constantly navigating the hustle of balancing work and life, you deserve a little indulgence now and then. That’s where the delightful skull lava cake steps in. This exquisite dessert isn’t just about aesthetics; it delivers rich flavor and a gooey chocolate center that makes it a standout treat for any occasion. Imagine walking through your door after a long day, the aroma of warm chocolate filling your home, and knowing that a perfect dessert awaits you!
Why Skull Lava Cakes are Perfect for Young Professionals
Skull lava cakes are the epitome of gourmet simplicity for those of us who love to impress but don’t always have the time for elaborate baking. Here’s why this dessert is your new go-to:
-
Quick and Easy to Prepare: With just a handful of ingredients, you can whip up this dessert in under an hour. That’s right! No more complicated recipes or hours spent in the kitchen. Plus, the baking process is so simple that it gives you extra time to catch up on your favorite shows or invite friends over for a little dinner party.
-
Impressive Presentation: Serving a skull lava cake is sure to wow your guests. It’s not just delicious; it also looks incredible. Imagine the ooze of molten chocolate spilling out as you cut into the cake. This presentation brings a touch of drama to any gathering, especially around holidays like Halloween or themed parties.
-
Customizable and Versatile: You can tailor your skull lava cake to suit your taste. Top it with fresh berries, a scoop of vanilla ice cream, or even a drizzle of caramel sauce. The options are endless, allowing you to experiment and find your perfect combination every time.
For tips on hosting the ideal dinner party and impressing your guests, consider checking out resources like Epicurious or Food Network.
So, if you are ready to take a break from your busy life while still treating yourself to something delicious, a skull lava cake is an irresistible option. Get your baking utensils ready, and let’s dive into this delicious recipe!
Ingredients for Skull Lava Cake
Essential ingredients for a spooky dessert
When it comes to creating a show-stopping skull lava cake, the right ingredients are key. You want that perfect mixture of rich chocolate goodness with a mysterious, gooey center that oozes delight. Here’s what you’ll need:
- Dark Chocolate: Aim for high-quality chocolate, ideally between 60%-70% cocoa for that intense flavor. It melts beautifully!
- Butter: A generous amount gives the cake its moist texture—don’t skimp here!
- Sugar: Granulated sugar for sweetness, balancing the rich chocolate.
- Eggs: Fresh, large eggs contribute to the cake structure and create a delightful custardy center.
- All-purpose Flour: A small amount is all you need to achieve that lava effect while keeping it rich.
- Turkey Bacon (optional): Crumbled and cooked for a unique savory twist (trust me, it’s surprisingly good!).
- Chicken Ham (optional): For those who love a savory kick, this adds an unexpected layer of flavor.
- Vanilla Extract: A splash enhances all the flavors beautifully.
Curious about how the chocolate reacts? Check out this expert guide for more insights. Gather these ingredients, and let’s get ready to whip up some spooky magic!
Preparing Skull Lava Cake
Creating a delicious skull lava cake isn’t just about following a recipe; it’s a fun kitchen project that results in an impressive and decadent treat! Perfect for Halloween parties or any spooky gathering, this cake is sure to steal the show. Let’s dive into how you can whip up this delight step-by-step.
Preheat and Prepare Your Molds
Start by preheating your oven to 425°F (220°C). While the oven gets nice and toasty, it’s time to prepare your skull molds. If you’re using silicone molds, there’s no need to grease them; they’ll release the cakes easily. However, if your molds are metal, a light coating of butter or non-stick spray goes a long way in ensuring a seamless unmolding process. Don’t forget to place your molds on a baking tray for stability during the transfer to and from the oven.
Mix the Dry Ingredients
In a large mixing bowl, it’s time to combine your dry ingredients. You’ll need:
- 1 cup all-purpose flour
- 1 cup powdered sugar
- 1/2 cup cocoa powder (use a quality brand for the best flavor)
- 1 teaspoon baking powder
- A pinch of salt
Whisk these together until they’re well mixed. This is important to ensure that your skull lava cake has an even texture with no lumps. When the dry ingredients are properly incorporated, they create a wonderful foundation for the moist, molten goodness that’s about to come!
Combine the Wet Ingredients
In a separate bowl, you’ll want to mix together your wet ingredients. For this, gather:
- 1/2 cup (1 stick) unsalted butter
- 2 large eggs
- 1 tablespoon vanilla extract
- 1/2 cup of your favorite coffee substitute or brewed coffee for that deep flavor
Melt the butter in the microwave or on the stove, then allow it to cool slightly before combining it with the eggs and vanilla. Stir until the mixture is smooth and well blended. The addition of coffee (or coffee substitute) really elevates the chocolate flavor—don’t skip this step!
Bring It All Together
Now the fun part begins! Gradually combine the dry ingredients with the wet mixture, stirring gently until everything is incorporated. Be careful not to overmix; you want to keep the batter light and airy.
Mold Your Cakes and Add the Molten Center
Here’s where the magic happens. Pour half of the batter into each skull mold, filling them about halfway. Now, for that signature skull lava cake center, add a spoonful of chocolate ganache or your favorite chocolate square right in the center of each mold. Then, top off the molds with the remaining batter, ensuring the chocolate is fully enclosed.
Bake to Perfection
Pop your filled skull molds into the preheated oven and bake for 10-12 minutes. The cakes should have risen nicely and the edges firmed up, while the center remains liquid. This is crucial for that iconic ‘lava’ effect! Set a timer and resist the urge to open the oven door too soon, as this can hinder their rise.
Unmold and Serve
Once they’re out of the oven, allow your skull lava cakes to cool in the molds for about 1-2 minutes. Carefully invert them onto plates—don’t wait too long, or they may stick! Dust with a bit of powdered sugar or top with whipped cream for an elegant finish.
Enjoying a sweet, gooey skull lava cake is sure to spark joy in your get-together. Team it up with some eerie decorations, and you have a guaranteed crowd-pleaser! For more fun dessert ideas, check out reliable sources like Food Network or BBC Good Food for inspiration and tips. Happy baking!
Variations on Skull Lava Cake
Fun Halloween-inspired alternatives
When it comes to the delightful world of skull lava cake, creativity knows no bounds. Why not add a spooky spin by infusing seasonal flavors? For a pumpkin patch twist, blend in some pumpkin puree or add a sprinkle of pumpkin spice to your batter. This not only enhances the flavor but also gives it an autumnal vibe!
Another fun mix-in is peppermint extract, which can add a refreshing zing, especially if you’re making these cakes around the holiday season. You can also consider using cookie crumbles or ghastly gummy worms as toppings for that extra creepy appeal. The visual impact can be as thrilling as the taste!
Making it a bit healthier
Want to enjoy your skull lava cake guilt-free? You can easily swap out some ingredients for healthier options. For instance, consider using whole wheat flour instead of all-purpose flour – it adds a nutty flavor while boosting fiber content.
Alternatively, you can substitute half of the chocolate with cocoa powder. Reducing sugar can also help; using natural sweeteners like stevia or honey can replace some of the refined sugars without sacrificing sweetness. If you’re watching your portions, you can create mini skull cakes in a muffin tin; they’re just as satisfying but slightly smaller!
Harvesting the goodness from these options allows you to indulge without the guilty conscience, setting the stage for a festive Halloween gathering. Curious to dive deeper into healthier baking tips? Check out resources from Healthline for more insights!
Baking notes for Skull Lava Cake
Tips for achieving the perfect lava effect
Creating the perfect skull lava cake is all about mastering the art of timing and temperature. You want that gooey, molten center to ooze beautifully as you cut into it. Here are some essential tips to help you achieve that lava bliss:
-
Quality ingredients matter: Invest in good-quality chocolate. The richer the chocolate, the more decadent your lava cake will be. Brands like Callebaut or Ghirardelli are excellent choices.
-
Watch the bake time: Each oven is a bit different. Start checking your cake a minute or two before the recommended baking time. You’re aiming for a firm outer layer, but a jiggly center—like a well-seated throne!
-
Chill your ramekins: After greasing them, chill your ramekins in the fridge for about 30 minutes before filling them. This helps the cakes hold their shape and cook consistently.
-
Let them rest: After baking, give the cakes a minute to cool before inverting them. This brief pause makes all the difference in keeping those lava centers intact.
If you’re curious about why chocolate works the way it does in baking, check out resources like Serious Eats for more insights on chocolate science. Happy baking!
Serving suggestions for Skull Lava Cake
Creative ways to present your spooky dessert
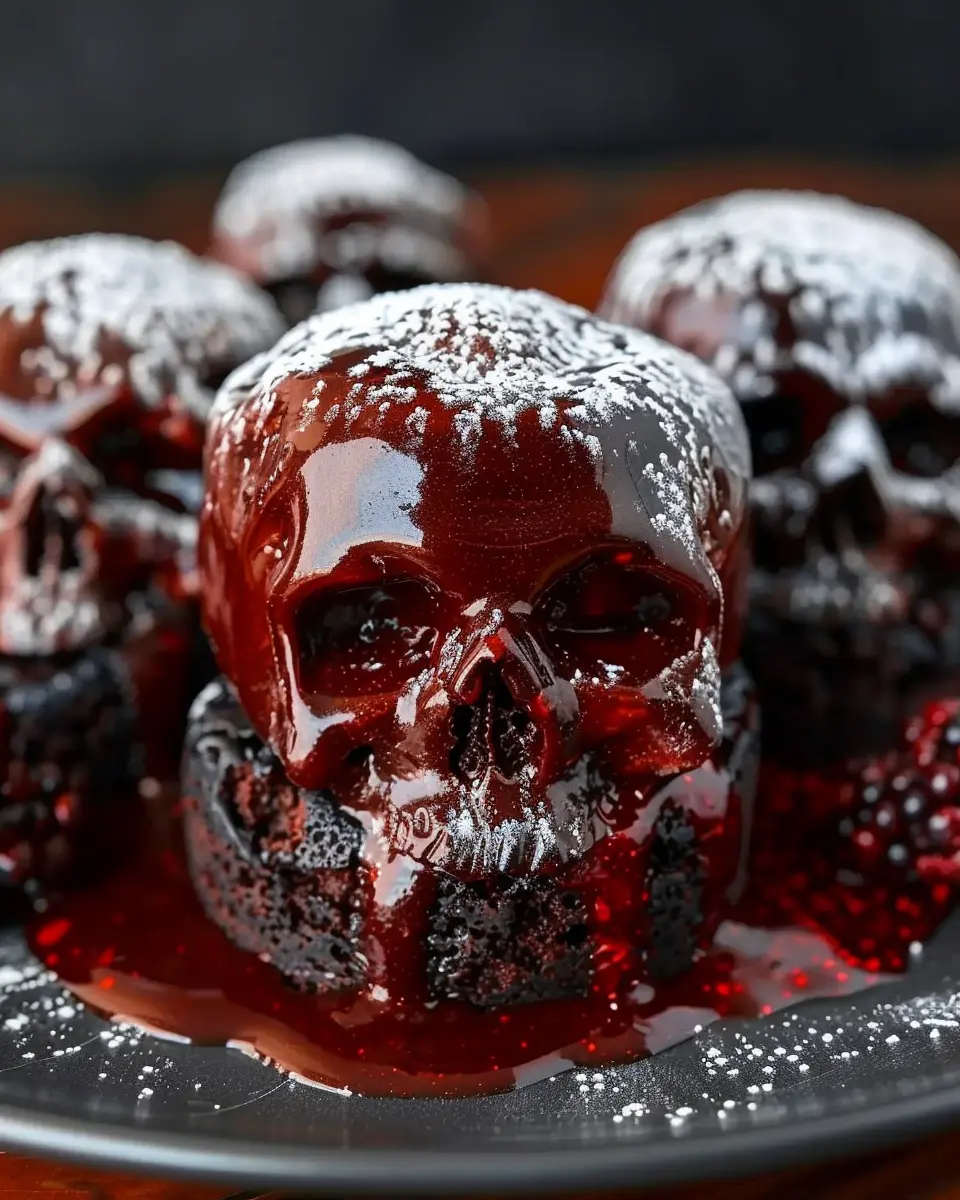
When it comes to serving your delicious skull lava cake, presentation can elevate this delightful dessert to the next level. Here are some fun and creative ideas to impress your guests:
- Edible garnishes: Add some flair with edible flowers or fresh berries. A sprinkle of powdered sugar can mimic “dust” on the skull.
- Chocolate sauce drizzle: Create a dramatic effect by drizzling rich chocolate sauce over the cake just before serving. This not only enhances the taste but also adds an eye-catching visual element.
- Festive plates: Consider serving your skull lava cake on Halloween-themed plates or cake stands to stay in the seasonal spirit. Black, orange, and even purple dishes can complement the theme perfectly.
- Colorful sauces: Pair your cake with vibrant sauces such as raspberry or passionfruit coulis, which will contrast beautifully with the dark chocolate.
These simple touches make your skull lava cake not just a dessert but a centerpiece for conversation at your next gathering. For more inspiring ideas, check out sites like FoodNetwork or Great British Chefs for guidance. Happy serving!
Tips for Making the Best Skull Lava Cakes
Common Pitfalls and How to Avoid Them
Creating the perfect skull lava cake can feel daunting, but a few common pitfalls can be easily avoided with the right techniques. Here are some tips to make sure your cakes turn out oozing with deliciousness every time.
-
Underbaking: One of the biggest mistakes is underbaking. The exterior should be set while the center remains gooey. A good rule of thumb is to bake for about 12-14 minutes, keeping an eye on them during the final minutes. When the edges look firm but the center is slightly wobbly, it’s time to take them out.
-
Overmixing the Batter: Mixing too much can lead to dense cakes. Instead, gently fold the ingredients until combined. A few lumps are okay; they will smooth out during baking.
-
Greasing the Molds: Make sure to generously grease and flour your skull molds. This prevents any tragic sticking disasters. Using a non-stick spray works wonders as well.
-
Chilling Before Baking: For a molten center, chill the batter once mixed for about 30 minutes. This helps create that luscious lava effect.
If you want to dive deeper into baking science, check out this article from Serious Eats on achieving the perfect molten lava cake.
With these tips, you’re well on your way to mastering the skull lava cake! Happy baking!
Time details for Skull Lava Cake
Preparation time
Making your skull lava cake starts off with some easy prep that takes about 15 minutes. Use this time to gather your ingredients and grease your cake molds properly. It’s crucial for achieving that perfect oozy center. The anticipation builds as you mix the rich chocolate batter—make sure to have a bowl handy for any spills!
Baking time
Once your batter is ready, it’s time for the oven. Bake your skull lava cake for about 10-12 minutes at 425°F (220°C). This quick bake allows the outer edges to set while keeping the middle gooey and delicious. You’ll want to keep a close eye on it, as overbaking can make that signature lava less impressive.
Total time
All in all, from prep to plate, you’re looking at roughly 30 minutes! It’s a manageable time commitment for this striking dessert, making it perfect for those unexpected gatherings or even a cozy night in. So, when you crave something sweet and want to make a statement, the skull lava cake won’t disappoint. For inspiration on more quick desserts, check out this resource.
Nutritional Information for Skull Lava Cake
Calories and Key Nutrients
When diving into the delightful world of Skull Lava Cake, it’s essential to balance indulgence with awareness of what we’re consuming. Each serving typically contains around 350-450 calories, depending on your specific ingredients and portion sizes.
Key nutrients to consider:
- Fat: 20-25g, a mix of saturated and unsaturated fats from the chocolate and butter
- Carbohydrates: 40-50g, mainly from the flour and sugar
- Protein: 5-8g, primarily from the eggs and any added ingredients
Remember, moderation is key. Have you ever thought about pairing this decadent dessert with a refreshing herbal tea or a rich coffee, which can enhance the chocolate experience? For a deeper dive into desserts and nutrition, check out the Harvard School of Public Health for some valuable insights! Enjoy your Skull Lava Cake guilt-free, knowing you’re treating yourself with flair.
FAQs about Skull Lava Cake
Can I make these in advance?
Absolutely! Skull lava cakes are a delightful treat that can be prepared ahead of time. You can mix the batter and pour it into your molds, then refrigerate them until you’re ready to bake. This not only saves time but also ensures a perfectly gooey center since they need a bit of chilling to set. Just remember to bake them straight from the fridge for that molten lava experience!
What are the best molds to use?
When it comes to creating those perfectly formed skull lava cakes, silicone molds are your best bet. They provide an easy release, making sure your cakes maintain their intricate design. Alternatively, if you prefer metal molds, ensure you grease them well. For a little extra flair, consider using novelty skull-shaped molds, which can make your desserts even more festive for occasions like Halloween or themed parties. You can find a variety of options on Amazon or Etsy.
How can I adjust the sweetness?
If you find that traditional recipes tend to lean on the sweeter side, you can adjust the sweetness of your skull lava cake by:
- Reducing the sugar in the batter by about 1/4 to 1/2 cup.
- Using dark chocolate instead of milk chocolate, as it typically has less sugar and adds a rich flavor.
- Incorporating unsweetened cocoa powder for a deeper chocolate taste without additional sweetness.
Experimenting with these adjustments allows you to craft the perfect balance that suits your palate. Trust me, once you find that sweet spot, you’ll be the talk of any gathering!
Conclusion on Skull Lava Cake
Recap and encouragement to give it a try
In wrapping up our delightful journey into the world of skull lava cake, it’s clear that this dessert is not only visually stunning but also incredibly delicious. By mastering the art of molten chocolate and incorporating fun aesthetics, you can impress guests or simply treat yourself.
Why not take a weekend to whip up this show-stopping dessert? It requires a bit of love and attention, but the joy of indulging in that rich, gooey center is absolutely worth it. Plus, your friends will be talking about your baking skills long after the last bite! If you’re looking for more baking inspiration, check out reputable sources like King Arthur Baking for tips and tricks. Happy baking!
PrintSkull Lava Cake: Indulgent Chocolate Treat for Home Chefs
Indulge in the rich, molten chocolate goodness of Skull Lava Cake, perfect for home chefs looking to impress.
- Prep Time: 20 minutes
- Cook Time: 14 minutes
- Total Time: 34 minutes
- Yield: 6 servings 1x
- Category: Dessert
- Method: Baking
- Cuisine: American
- Diet: Vegetarian
Ingredients
- 1 cup all-purpose flour
- 1/2 cup unsweetened cocoa powder
- 1 cup granulated sugar
- 1/2 cup unsalted butter
- 3 large eggs
- 1 teaspoon vanilla extract
- 1/2 teaspoon baking powder
- 1/4 teaspoon salt
- 1/2 cup chocolate chips
Instructions
- Preheat the oven to 425°F (220°C).
- Grease and flour six ramekins.
- Melt butter and chocolate chips together in a double boiler.
- In a bowl, whisk together flour, cocoa powder, sugar, baking powder, and salt.
- Add eggs and vanilla to the chocolate mixture and stir well.
- Combine the wet and dry ingredients until just mixed.
- Pour the batter into the prepared ramekins.
- Bake for 12-14 minutes until the edges are firm but the center is soft.
- Let cool for 1 minute before inverting onto plates.
Notes
- Serve immediately with ice cream for an extra treat.
- Can top with powdered sugar for a decorative touch.
Nutrition
- Serving Size: 1 lava cake
- Calories: 350
- Sugar: 25g
- Sodium: 150mg
- Fat: 20g
- Saturated Fat: 12g
- Unsaturated Fat: 8g
- Trans Fat: 0g
- Carbohydrates: 40g
- Fiber: 3g
- Protein: 5g
- Cholesterol: 80mg
Keywords: Skull Lava Cake, chocolate, dessert, baking